

I love keeping home canned corn on hand. Although canning corn takes a little bit longer than canning other vegetables does, it’s totally worth it. There’s nothing like the flavor of locally grown sweet corn during summer, and when you can your own corn you can enjoy that bit of summer all year long.
We like to use canned corn for recipes like taco soup, shepherd’s pie and black bean and corn salsa. I will also add corn to our venision or beef stew if corn wasn’t available when I canned the stew. I love having local, home canned corn in my pantry to use in these dishes.
I have a super fancy recipe for canning corn, basically it’s corn, water, and bit of non-iodized salt. I guess that’s not really fancy, but it is good.
Preparing the corn for canning
Before you can pressure can the corn you need to prepare it by shucking it and cutting it off the cob. We like to do this outside since we seem to be kind of messy corn shuckers and we’re usually doing about 100 ears at a time. It’s just better if we do it outside.
When we shuck the corn we also remove as much silk as we can and cut out any bad spots.
Once it’s all shucked we bring it inside and start cutting it off the cob. We just use a sharp knife and an old roasting pan. I’ve heard of some people using a bundt cake pan and balancing the cob on the middle and letting the cut kernels drop down into the pan. I don’t have bundt pan but if you do it’s worth trying.
Some people blanch their corn cobs before cutting off the corn kernels. I don’t, I’m pretty much an anti-blancher, but if you want to blanch the corn first feel free to.
How to blanch the corn
- Fill large pot with water and bring to a boil.
- Fill sink with ice water.
- Put corn on cob in boiling water for 2 minutes (any longer and it will start cooking, so 2 minutes only)
- Remove corn with tongs and put into ice cold water to stop cooking process


How to Can Corn
I like to do what’s called a raw pack for canning corn. That means you don’t heat the corn up before you can it. If you want to do a hot pack, put the corn in a pot and add some water and simmer the corn kernels for 5 minutes.
Once the corn is prepared it’s time to prepare the supplies. If you have help with shucking and cutting the corn, you can go ahead and prepare the canning jars, lids, and pressure canner while the shucking and cutting is going on.
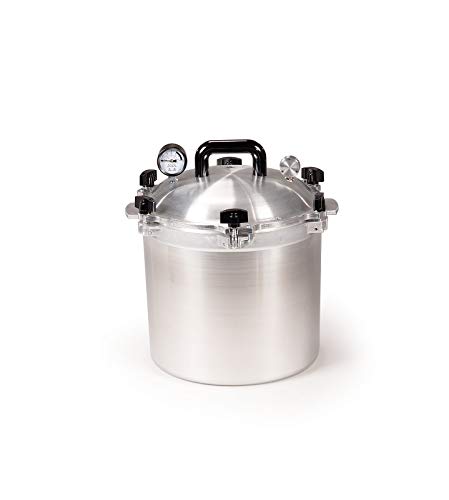
You absolutely need to use a pressure canner to can corn properly. I *know* great, great grandmas just boiled it forever in a water bath, however, that’s all they had and truly we have no idea what some of those consequences were. Pressure canners are widely available and if you use it regularly you’ll make your invest back in less than a year. It’s truly a time and money saver. Here are some tips for using a pressure canner.
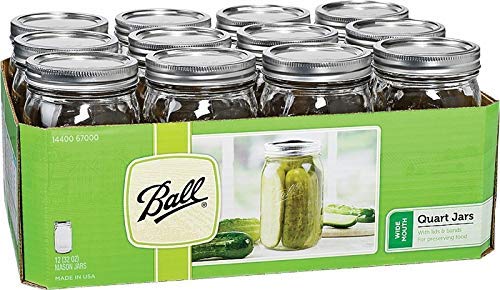
It takes about 2 – 2 1/2 cobs of corn to fill one pint size mason jar. So, if you have 100 ears of corn you’ll need about 40-50 pint size canning jars or 20 – 25 quart size jars.
- Wash jars and hot soapy water and rinse them well (There is no need to sterilize jars or lids if you’re processing for more than 10 minutes – which we are)
- Wash lids
- Put pressure canner on stove and add water and rack according to the manufacturers instructions.
- Fill a pot or large tea kettle with water and set it to boil (this is for filling the jars)
- Put non-iodized salt in each jar – 1/2 tsp per pint and 1 tsp per quart (optional, for seasoning purposes only)
- Pack corn kernels into jars. I don’t stuff them full, loosely pack them and leave a 1 inch headspace. If you don’t have enough head space remove a few kernels of corn with a spoon.
- Add boiling water to jars leaving a 1 inch headspace
- Using a plastic spatula, a chopstick, or bubble remover, remove the air bubbles in the jars by gently sliding the bubble remover tool between the jar and the corn.
- Wipe jar rims
- Put lids and bands on jars. I like to use reusable canning lids for corn since I don’t usually give them away.
- Put the jars in your pressure canner and process according to the directions that came with your canner. For me that 10 pounds of pressure for 55 minutes for pints and 85 minutes for quarts.
- Once the corn is finished processing remove from pressure canner and let cool
- Once the canned corn is cool, remove bands, check seals, wipe jars, label, and put away.


Canning Corn - hot pack or raw pack method


Preserving corn by canning is a great way to have shelf stable corn all year long.
Ingredients
- Fresh corn on the cob - about 2 ears per pint size mason jar
- Non-iodized Salt - 1/2 tsp per pint, 1 tsp per quart
- Water
Instructions
Preparing the corn for canning
- Shuck the corn and remove the cornsilk and any bad spots
- Some people blanch their corn cobs before cutting off the corn kernels. Instructions are below.
- Remove the corn kernels from the cob with a sharp knife
How to blanch corn for canning
- Fill large pot with water and bring to a boil.
- Fill sink with ice water.
- Put corn on cob in boiling water for 2 minutes (any longer and it will start cooking, so 2 minutes only)
- Remove corn with tongs and put into ice cold water to stop cooking process
How to can corn
- Wash jars and hot soapy water and rinse them well (There is no need to sterilize jars or lids if you’re processing for more than 10 minutes – which we are)
- Wash lids
- Put pressure canner on stove and add water and rack according to the manufacturers instructions.
- Fill a pot or large tea kettle with water and set it to boil (this is for filling the jars)
- Put salt in each jar – 1/2 tsp per pint and 1 tsp per quart (optional, for seasoning purposes only)
- Pack corn kernels into jars. Don’t stuff them full, loosely pack them and leave a 1 inch headspace.
- Add boiling water to jars leaving a 1 inch headspace (if you don't have enough headspace, remove a few kernels of corn with a spoon.)
- Using a plastic spatula, a chopstick, or bubble remover, remove the air bubbles in the jars by gently sliding the bubble remover tool between the jar and the corn.
- Wipe jar rims
- Put lids and bands on jars. I like to use reusable canning lids for canning corn since I don’t usually give them away.
- Put the jars in your pressure canner and process according to the directions that came with your canner. For me that 10 pounds of pressure for 55 minutes for pints and 85 minutes for quarts.
- Once the corn is finished processing remove from pressure canner and let cool
- Once the canned corn is cool, remove bands, check seals, wipe jars, label, and put away.
Recommended Products
As an Amazon Associate and member of other affiliate programs, I earn from qualifying purchases.

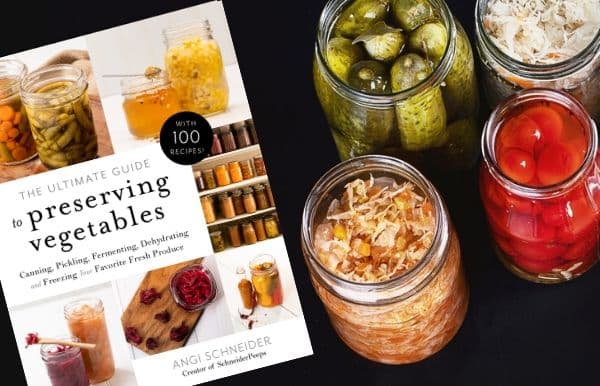

The Ultimate Guide to Preserving Vegetables
If you you’re looking for more preserving inspiration, I know you’ll love The Ultimate Guide to Preserving Vegetables. In this book I share how to can, dehydrate, freeze and ferment almost every vegetable. I also share 100 favorite recipes for preserving the vegetables in fun way that will save you time and money later. Get your copy here. Get your copy here.
Using Home Canned Corn
In addition to eating canned corn all by itself – just add little butter and pepper and a spoon – we also like to use it in other dishes. Canned corn can be substituted in almost any recipe that calls for frozen corn, just drain the liquid.
Here are some fabulous recipes that use canned corn.
Shredded Chicken Slow Cooker Tacos
Creamy Corn Chowder
Mexican Street Corn Pasta Salad
Parmesan Zucchini Corn Skillet
Cheesy Bacon Corn and Pepper Bread
Roasted Cauliflower, Potato, and Corn Chowder
Easy Italian Tuna Corn Salad
Lentils Corn and Pepper Salad
Southern Shrimp and Corn Fritters
South African Sweetcorn Bread
Other Home Canned Vegetables
Corn isn’t the only vegetable that is super easy to can at home. Canning potatoes is a great way to be prepared for crazy weeknight meals or emergencies.
At the end of our spring season or the early part of our summer when the temperatures start to soar, I harvest all our carrots and spend an afternoon canning carrots. The processing time for carrots is much shorter than corn, making it go fast, which is nice.
Judy
Monday 18th of September 2023
Is it possible to can corn without a pressure canner? Some recipe with maybe sweet peppers and onions added? I have frozen a lot of corn but would like to can corn some how Any advice or suggestion is welcomed
Angi Schneider
Monday 18th of September 2023
The only way to can corn without a pressure canner is to add vinegar and make a corn relish or corn salad with it. I have a recipe for Corn Salad in my book The Ultimate Guide to Preserving Vegetables which was based on this recipe from the National Center for Home Food Preservation.
Leann
Monday 21st of August 2023
how long does canned corn last on the shelf
Angi Schneider
Tuesday 22nd of August 2023
The USDA recommends that home canned food be consumed within a year because the quality of the food starts to deteriorate over time. That being said, as long as the jar remains sealed, the corn will be safe to consume.
Evelyn Stoughton
Monday 8th of August 2022
Last year, we canned corn in our pressure canner. A few weeks later, I opened a jar and it had no flavor. What did I do wrong? Is it better to cold pack? How long would I water bath them?
Angi Schneider
Monday 15th of August 2022
Corn needs to be pressure canned to be safe; there are no current recommended guidelines for water bath canning corn. Did you use salt? Salt helps the corn retain it's color and flavor. If you hot packed them last year, it would be worth trying a raw pack this year to see if there's a difference.
Crystal
Wednesday 3rd of August 2022
I don;'t have a pressure canner, really don't like them (had one blow up on me as a kid) can i use a regular canner instead.
Angi Schneider
Thursday 4th of August 2022
Nope, corn is a low acid food and the only way to know it's safe to eat is to use a pressure canner. Modern pressure canners have a safety release button that will open to release the pressure if it gets dangerously high so they don't blow up.
Mike
Friday 22nd of July 2022
How long does this last, once canned
Angi Schneider
Sunday 24th of July 2022
The USDA recommends home canned food be used within 12-18 months as the food quality starts to deteriorate over time. As long as it's sealed it's safe to eat.