Pressure canning is how you can stock your pantry with shelf stable low acid foods, such as vegetables, meats, legumes and even meals in jars. While it can seem intimidating at first, learning how to use a pressure canner is actually quite easy.

It’s funny how when people find out that you pressure can food, they want tell you their “horror” stories of someone almost blowing up their kitchen because they did something wrong. Well, I’m here to tell you that they were probably exaggerating.
Not to say that you don’t have to be careful with pressure canners, you do. But they aren’t so sensitive that we need to be scared of them. You just need to keep a few things in mind.
The two basic rules of pressure canning are follow the instructions that came with your pressure canner and use current safety guidelines for canning. If you do those two things, there is zero risk with pressure canning.
How do pressure canners work?
In pressure canning, the filled mason jars are put into a large pot with a little water. The pot has a special lid with a small vent. The lid clamps on the pot creating a pressurized environment when the pot is heated. While the water in a pressure canner can still only reach 212°F, the trapped steam will cause the air temperature to exceed 240°F. This temperature is high enough to kill Clostridium botulinum spores which is the bacteria that produces botulism spores.
In order to activate, C. botulinum spores need a low acid, anaerobic, moist environment – the exact environment that we create when we can low acid foods.
Different foods need to be processed for various times at 240°F to ensure that all the C. botulinum spores are destroyed before they activate and create the botulism toxin. The recipe will tell you how long the food needs to be processed for. Using the correct processing time is super important. There are charts with processing times for each food group in my book, Pressure Canning for Beginners and Beyond.
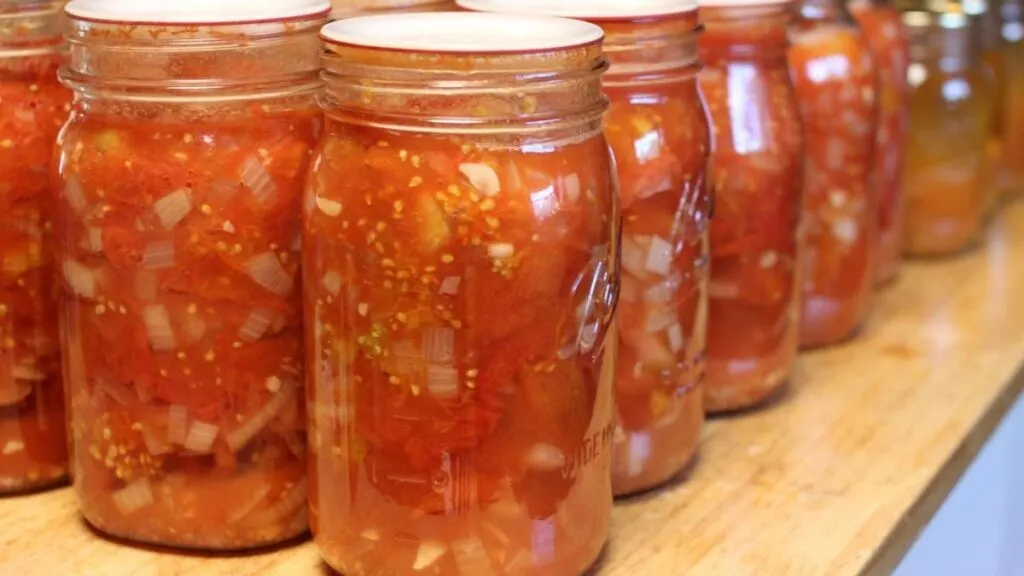
What foods require pressure canning?
Low-acid foods have a pH greater than 4.6 and include vegetables, meats and legumes. C. botulinum spores thrive in this environment and must be destroyed by heating the food to 240°F and maintaining that temperature for a specified time, usually 20 minutes to 2 hours. The following must be canned in a pressure canner…
- Vegetables
- Some tomato products
- Meat (beef, pork, chicken, wild game, etc.)
- Seafood (fish, clams, oysters, shrimp, etc.)
- Legumes
- Vegetable mixes
- Broths and Stocks
- Soups
There are some low acid foods that should not be pressure canned at home. Those foods include the following…
- Mashed foods
- Milk and dairy products
- Grains and flour
- Cured meats

Tips for Using a Pressure Canner
Take a breath and keep calm. Really, there’s nothing to worry about. Unless you are trying to explode the canner or are being grossly negligent you’ll be fine.
Inspect your canner before using it each season. If your canner has a gasket, make sure it’s in good shape or buy a new one. If your canner has a a dial gauge (no weights at all), you should have it tested to make sure that it’s reading accurately. If your canner has weights make sure they are in good condition (and that you actually have them).
Keep the manual that came with your pressure canner handy. I marked the pages that I want to refer back to with sticky notes. If you don’t have a manual, call the manufacturer or search online for a digital copy.
If this is your first time to use a pressure canner, you can run a test batch by canning water. Yep, just fill up some jars with water leaving a 1″ head space, put lids on them, and follow the directions in your book to can them. Obviously, there won’t be times or instructions for water so use the instructions for fruit. You won’t need to can it for the same amount of time but you will want to get the pressure up to the amount you need based on your altitude and use the canning time to adjust your heat to keep the pressure consistent. When you feel like you’ve got a good idea of what your stove temperature needs to be, turn it off and let it cool off and depressurize.
It’s best to use recipes that follow USDA guidelines. I know people have canned pumpkin puree and lived to tell about it. But really, how hard is it to just follow the rules and cube the pumpkin instead of pureeing it to can? Since I don’t have a laboratory and fancy equipment to test the puree to make sure it gets heated all the way through, I’m just going to trust the people who do.
There is plenty of room within the safe guidelines to make plenty of tasty and safe canned goods. Of course, you can do what you want, this is just what I do.
Be mindful of the head space. If you’ve done any water bath canning you know that the typical head space is 1/4″. But when you pressure can it’s more, much more. The recipe should tell you how much head space to leave but it’s usually about 1″.
Wipe the rims before putting the lid on. I always think I’m careful and don’t get anything on the rims when I can. But last year I had quite a lot of jars not seal properly because I was in a hurry and didn’t wipe the rims. This year I’ve been more diligent and wiped the rims and haven’t had that problem.
Once the time is up, turn off the burner and leave the canner alone. It will cool down and depressurize in it’s own time. Ours takes about 30-40 minutes to completely depressurize. After it’s depressurized, take the weight off and let it sit for about two minutes.
When you remove the lid from the pressure canner, be sure to remove it away from your face. There will be a lot of steam coming out of the canner and you don’t want to steam your face.
When you remove the jars from the canner, they will be hot. In fact, they may still be boiling inside. Put them on a towel a few inches apart from each other and leave them alone. I usually just let them cool overnight and check their seal in the morning.
How to Use a Pressure Canner
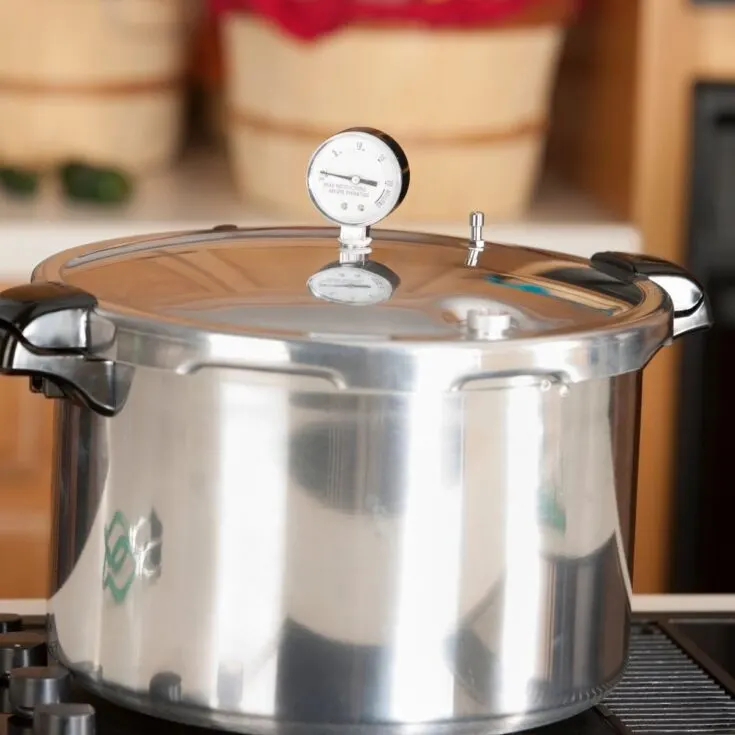
Pressure canning can be intimidating but it doesn't have to be. When you properly use a pressure canner you can fill your pantry with self stable vegetables, meats, legumes, and meals in a jar.
Tools
- Pressure canner
- Canning jars
- Canning lids and bands
- Canning funnel
- Bubble remover and headspace checker
Instructions
- Wash the pressure canner and the racks. Fill the pressure canner with about 3″ of water (refer to the manufacturer’s instructions for how much water to use in your canner.)
- Put the rack in the bottom of the canner and put the canner on the stove. Heat the water until it’s hot but not boiling – about 140F for raw-packed jars and 180F for hot-packed jars.
- The jars and lids should be washed in hot, soapy water. While washing the jars, look for any nicks or cracks along the rim. Don’t use any jars with nicks or cracks in them. The jars don’t need to be sterilized but they need to stay hot, therefore, I put the jars in the pressure canner with the hot water while I prepare the carrots. Ball/Kerr no longer recommend that their lids be hot before using, other manufacturers do recommend the lids be hot. I suggest reading the instructions on the box of lids because the recommendations can change.
- Follow the recipe instructions for preparing the food. This is an important safety part of pressure canning, food needs to be prepared according to the current guidelines.
- Remove the jars from the canner (or wherever you had them to keep them hot) and put them on a towel on the counter.
- Fill the jars with the prepared food leaving the correct headspace.
- Using a bubble removal tool, remove the air bubbles from the jars. If you don’t have a bubble removal tool, you can use a silicone spatula or chopstick, but don’t use a butter knife or anything metal.
- Recheck the headspace and add additional liquid if needed.
- Wipe the rims of the jars with a clean, damp cloth.\
- Put the lids and bands on the jars and tighten to fingertip tight (about how you’d put a lid on a jar of mayonnaise).
- Put the filled jars into the canner and lock the lid onto the canner. Follow the directions that came with your canner for venting and bringing your canner up to pressure. Process the jars at the time and pressure stated in the recipe. Adjust for altitude, if needed.
- Be sure to vent the canner for the time specified in the manufacturer's guide (usually 7-10 minutes).
- Don't start timing until the canner is up to the correct pressure as noted in the recipe.
- Keep an eye on the canner, especially if you have a dial gauge canner. If the pressure drops below what it's supposed to be you have to start your timing over....bummer. So, it's best to just stay in the kitchen and keep an eye on it, especially when you're still trying to figure out what your stovetop temperature needs to be to keep the pressure consistent.
- When the processing time is complete, turn off the heat and let the pressure canner depressurize naturally. Refer the manufacturer’s instructions for opening the canner.
- Once you open the canner, let the jars sit in the open canner for about 5 minutes before taking them out. Set them on a towel on the counter to cool for 12 hours….I usually just let them sit overnight.
- Take the bands off the jars and make sure they all sealed before storing them in the pantry. If any didn’t seal, put them in the refrigerator to use first. Home canned goods should be used within 12 months.
Recommended Products
As an Amazon Associate and member of other affiliate programs, I earn from qualifying purchases.



Hettie
Friday 22nd of September 2023
Thanks for this, Angi. I have a pressure canner but I've been afraid to use it. Now, I feel I can confidently give it a go. Best wishes for a happy autumn,
Audrey
Thursday 30th of April 2020
Can canning be done in a crock pot express crock multi-cooker?
Angi Schneider
Thursday 30th of April 2020
Hi Audrey, no canning cannot be done in the any electric multi-cooker. Here is an article from the National Center for Home Food Preservation about their findings.
Rosz
Saturday 1st of April 2017
Hi Angi, I just finished canning 28 quarts of beef stew and had one not seal so it's in the fridge . I have an all American 930 pressure canner. I want to try your chili recipe and can it. About the lids, do we still have to boil them for water bath canning? Thank you Rosz
Rose Cutler
Saturday 8th of April 2017
Thanks Angi, I'm trying to spring clean and can so I haven't tried any more canning yet but God willing I will. Blessings Rosz
Angi Schneider
Saturday 1st of April 2017
Hi Rosa, how fun! I always have a couple of seals that fail and we just eat it in the next few days. According to this article by Ball, http://www.freshpreserving.com/canning-lids-101.html, you don't need to pre-warm their lids. It says you still can, but it's not necessary. They do say that we shouldn't be boiling them ever. This applies to water bath canning too.
Shellee
Saturday 2nd of July 2016
Add a glug of white vinegar to the water. This will help keep your jars clear of the white deposit that will form on your jars.
Angi Schneider
Monday 4th of July 2016
Great tip! I did that too, but totally forgot to mention it. Thanks for sharing.
Donna Kauffman
Thursday 30th of June 2016
Wonderful post! Just one thing, Ball now says do not heat lids. The rubber rim is made different now, and heating the lids can cause failure to remain sealed. All you need to do is wash in warm soapy water, and they can wait on the counter until you're ready to use them.
Angi Schneider
Thursday 30th of June 2016
Hi Donna, thanks for the updated guidelines I'll edit the post. According to their website this applies to both Ball and Kerr brand lids (Ball owns both brands) http://www.freshpreserving.com/canning-lids-101.html.