Salves are probably the easiest herbal skin care product to make at home. They’re fantastic for healing and soothing all kinds of skin conditions. If you’re new to this diy lifestyle you may find yourself asking, “Yeah, but what IS a salve?”


What is a salve?
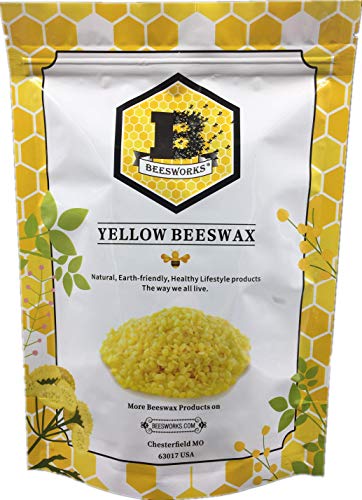
A salve is basically an ointment that is applied to the skin to heal skin issues and reduce pain or inflammation. It can be as simple as mixture of oil and a little wax, usually beeswax, to firm it up a bit.
Making a salve that isn’t runny but will rub in the skin easily is all about the ratio of beeswax to oil. Depending on what the salve is for I’ll use a 1 part beeswax to 6 parts oil. We’ll talk more about how to measure this out in a bit.
You could also use candelilla or carnauba wax but unless you live where these plants are grown it’s probably best to just stick with beeswax. Unless, of course, you’re vegan then these other waxes will work great for you.
You can use any oil for salve making but the most popular ones are olive, coconut, sweet almond, sunflower, apricot, and tallow. Each of these have their own health benefits but unless you’re making the salve to deal with a very specific skin condition and a certain oil is recommended, I suggest using whatever you already have.
The main healing benefit you’ll receive from the salve is from the physical barrier it provides that not only moisturizes but also locks in moisture. Also, if you infuse the oil with herbs you’ll increase it’s healing power.
Regardless of the oil I use, I like to infuse it with herbs depending on what I’m making the salve for. Here is a step by step tutorial on how to make herbal infused oil.
If you’re making a drawing salve, you’ll want to add activated charcoal and clay to it.
One thing salves never have in them is any water. Homemade skin care products that contain water are tricky because the water can quickly make the oils go rancid.
Sometimes a salve will have an herbal tincture in it but since tinctures are made with alcohol they are fine to add to your salve.

How to Make a Salve
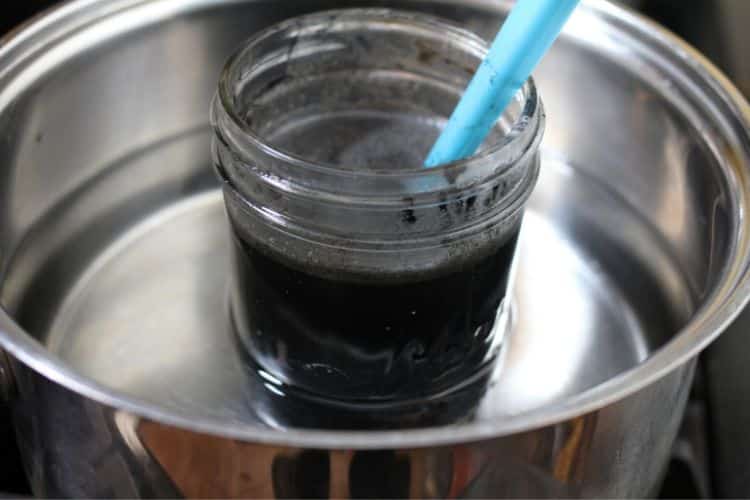
To make a salve, you’ll need a double boiler. I just use a makeshift double boiler with a mason jar and a pot of water.
Start by infusing the oil with herbs. If you already have infused oil made, then you can skip this step.
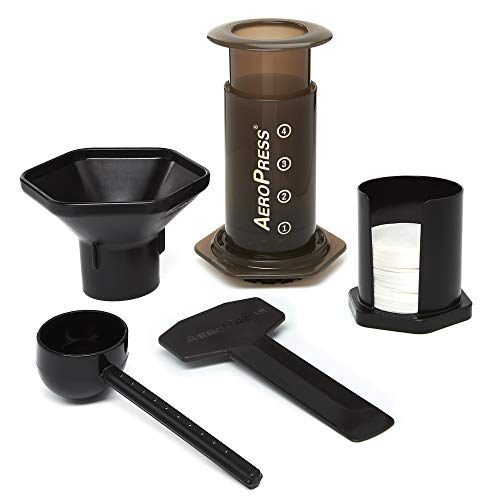
Once the oil has been infused with herbs, strain the herbs out of the oil. In the past I’ve used cheese cloth and mesh strainer and it works fine. I now have an AeroPress that I use just for my herbal infusions.
Once the oil is strained, put it in a clean mason jar and measure how much you have and then add the wax. For every 6 ounces of oil, you’ll want to add 1 ounce (liquid, not weight) of beeswax.
The easiest way to do this is to add enough beeswax to the jar to make the oil level go up to the next ounce mark. This isn’t an exact science, so don’t get hung up on doing it perfectly.
Put the jar into the pot of water, making sure that no water will get into the jar. Heat the water over medium heat until the wax is melted.
Put a metal spoon in the freezer. We’ll use this to test the consistency of the salve.
Once the wax is melted, take the spoon out of the freezer and dip it into the hot salve. It should set up pretty quickly. If you need the salve to be a little thicker add more beeswax, if it’s a little too thick, add a little oil.
Once the consistency is how you like it, pout the salve into smaller containers. I like to use 4oz mason jars or 2-4 oz tins.


How to use a salve
Use salves just like you would any ointment, gently rub it onto the area that needs relief. That being said, salves can sometimes feel oily and if you’re covering a large area, you might want to cover it with gauze.
When we use our drawing salve we cover the area because the activated charcoal can stain clothing.
My husband uses a salve for post-hepatic neuralgia on his chest almost daily. We’ve found that he really needs to wear an undershirt to keep the oil from messing up his work shirts.
You can apply a salve as often as needed to help with dryness, itchiness, or pain.
What is a balm?
A balm is similar to a salve but thicker, meaning it has more beeswax…think lip balm (ChapStick) consistency.
Many people suggest a 1:1 ration but I find that entirely too hard even for a balm. I prefer a 1:3 or 1:4 ratio (with the 1 being beeswax and the 3 or 4 being oil.)
A balm will also often have essential oils in it, again think lip balm. Since balms are quite thick, they it takes a bit of rubbing to get them smeared on the skin. This makes balms perfect for soothing sore muscles.


Attainable Self Reliance
One of the things I love most about making salves is that most of the ingredients come from my property. We raise bees so we always have plenty of beewax and I grow many of the herbs we use to infuse oils.
If we raised our own meat, we could use tallow in salves and have a truly homemade product.
I think simplifying things and using what you have or have access to locally is a fantastic way to practice a level of self reliance.
A few weeks ago I received a copy of Attainable – Sustainable: The Lost Art of Self-Reliant Living by Kris Bordessa. In the book she has several recipes for salves and other simple natural remedies.
The book is published by National Geographic so, of course, it’s absolutely beautiful. But more importantly, it’s filled with simple, “attainable” projects to help you get a little further down your simple living path.
These projects include food, handiwork, natural cleaning, growing food, raising animals, and even just getting outside to enjoy a simple life. Many of these things I already do, and yet, I found so much inspiration from this book.
My commitment to be more of a producer and not just a consumer was renewed. And my resolve to make do with what I already have instead of pining after the new and improved was strengthened.
I think anyone desiring to live a more sustainable life in a way that’s not overwhelming would benefit from Attainable – Sustainable: The Lost Art of Self-Reliant Living.


How to Make a Salve


Salves are easy to make and so very helpful when dealing with skin issues. Use this basic salve recipe to make an herbal salve.
Materials
- 1 cup oil (olive, coconut, sweet almond, apricot, or tallow)
- 1 - 1.5 ounces grated beeswax
- Herbs of choice - chickweed, comfrey, plantain, calendula, etc.
Tools
- saucepan with water
- 1 pint mason jar
- chopstick or spatula to stir with
- spoon
- jars or tins to put finished salve in
Instructions
- To make a salve, you'll need a double boiler. I just use a makeshift double boiler with a mason jar and a pot of water.
- Start by infusing the oil with herbs. If you already have infused oil made, then you can skip this step. If you need to know how to infused oils, here's a step by step guide.
- Once the oil has been infused with herbs, strain the herbs out of the oil. In the past I've used cheese cloth and mesh strainer and it works fine. I now have an AeroPress that I use just for my herbal infusions.
- Once the oil is strained, put it in a clean mason jar and measure how much you have and then add the wax. For every 6 ounces of oil, you'll want to add 1 ounce (liquid, not weight) of beeswax.
- The easiest way to do this is to add enough beeswax to the jar to make the oil level go up to the next ounce mark. This isn't an exact science, so don't get hung up on doing it perfectly.
- Put the jar into the pot of water, making sure that no water will get into the jar. Heat the water over medium heat until the wax is melted.
- Put a metal spoon in the freezer. We'll use this to test the consistency of the salve.
- Once the wax is melted, take the spoon out of the freezer and dip it into the hot salve. It should set up pretty quickly. If you need the salve to be a little thicker add more beeswax, if it's a little too thick, add a little oil.
- Once the consistency is how you like it, pout the salve into smaller containers. I like to use 4oz mason jars or 2-4 oz tins.
Recommended Products
As an Amazon Associate and member of other affiliate programs, I earn from qualifying purchases.