These sweet and spicy pickles are a family favorite as they have a perfect balance of tang, sweet, and spice. This is a canning recipe, although you can make them and store them in the refrigerator instead of canning them.


We make several different pickles each year to be sure we have some of everyone’s favorites. Besides sweet and spicy pickles, we make refrigerator dill pickles, fermented dill pickles, my Granny’s bread and butter pickles, and canned dill pickles.
These pickles are great on sandwiches, in tuna or chicken salad, part of a charcuterie board or deli platter. Once the pickles have been eaten, you can use the leftover brine to make salad dressing or marinade meat.
Ingredients for homemade sweet and spicy pickles
Cucumbers – The type of cucumbers you use to make homemade pickles matters. The best cucumbers to use for any kind of pickling are pickling cucumbers Pickling cucumbers have thinner skin and are drier than slicing cucumbers. Some popular pickling cucumber varieties are National Pickling, Boston Bush and Kirby Cucumbers. English cucumbers or Persian cucumbers can also work for pickle making because they have thin skin. But don’t try to use regular cucumbers (slicing cucumbers) as they will make soggy pickles. Also, use small cucumbers to get the crunchiest pickles.
Vinegar – I use white vinegar and apple cider vinegar in this recipe. That being said, you can use any vinegar that has 5% acidity (it will be listed on the label). If you like a more mild vinegar flavor try just apple cider vinegar or white wine vinegar.
Salt – Canning salt is recommended for making pickles because it doesn’t have any anti-caking agents or minerals in it. If you don’t have canning salt, you can use any pure salt, including kosher salt or sea salt. If the only ingredient listed on the label is salt, you can use it. Just be aware that some salts have naturally occurring minerals and those minerals might make the pickles soft. Don’t use regular table salt (iodized salt) for making pickles.
Sugar – I use raw sugar but white sugar will work too. Just use whatever sugar you normally use in your home. These are sweet pickles but not overly sweet. You can adjust the sweetness using more or less sugar.
Onions – We like to put fresh onions in our sweet and spicy pickle recipe. It’s completely optional so you don’t have to use them, but I highly recommend it because they’re so tasty. I usually use a sweet onion but, honestly, yellow or white onions work just fine.
Fresh Garlic and Other Herbs – For sweet and spicy pickles I like to use a combination of fresh garlic, yellow mustard seed, ground turmeric, whole coves and crushed pepper flakes. I prefer to just put the spices in the jars as I’m making pickles but you can make a pickling spice blend and have it ready all season long.
Many of these can be grown in the home garden. If you need to purchase any herbs don’t grab the little jars at the grocery store they’re very expensive that way. Instead, order in bulk from Starwest Botanicals, which is my favorite place to order herbs that I don’t grow.


How to Make Sweet and Spicy Pickles
Step 1: Prepare the fresh cucumbers, onions and garlic
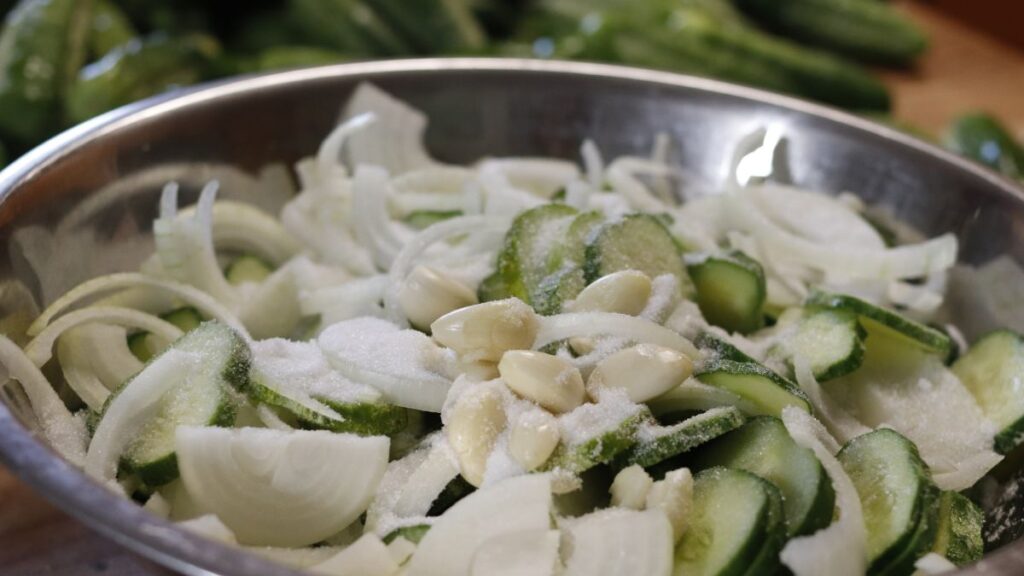
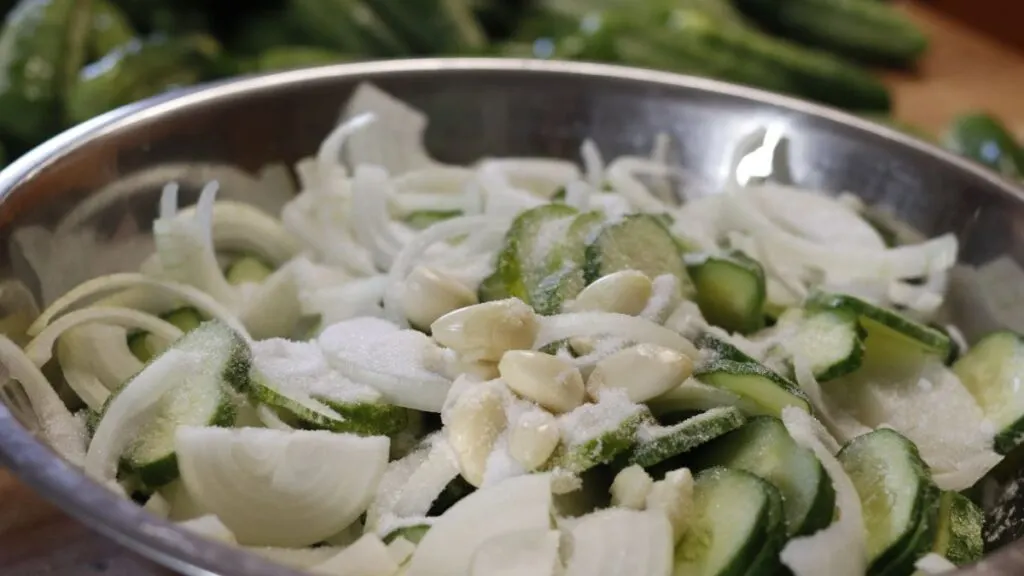
Start by washing the pickling cucumbers thoroughly. Trim off the blossom end of the cucumber, that’s the end that is not attached to the vine. The blossom end has an enzyme in it that can make the pickles soft. Some people prefer to cut off both ends and that’s perfectly fine. Slice the cucumbers into rounds about 1/4-inch thick. Peel the onion and garlic. Slice the onion into 1/4-inch slices and leave the garlic cloves whole.
Step 2: Ice and Salt the produce
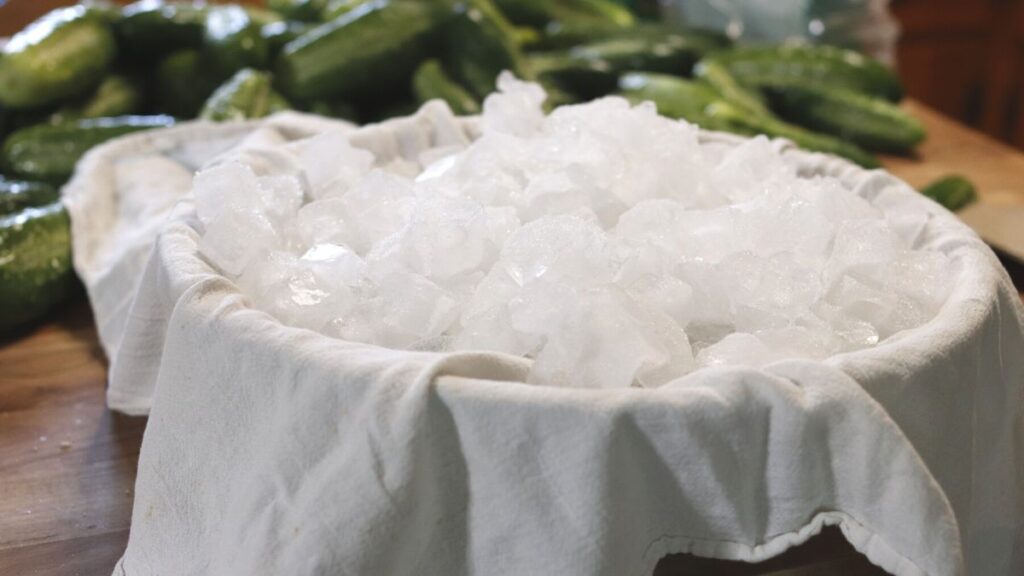
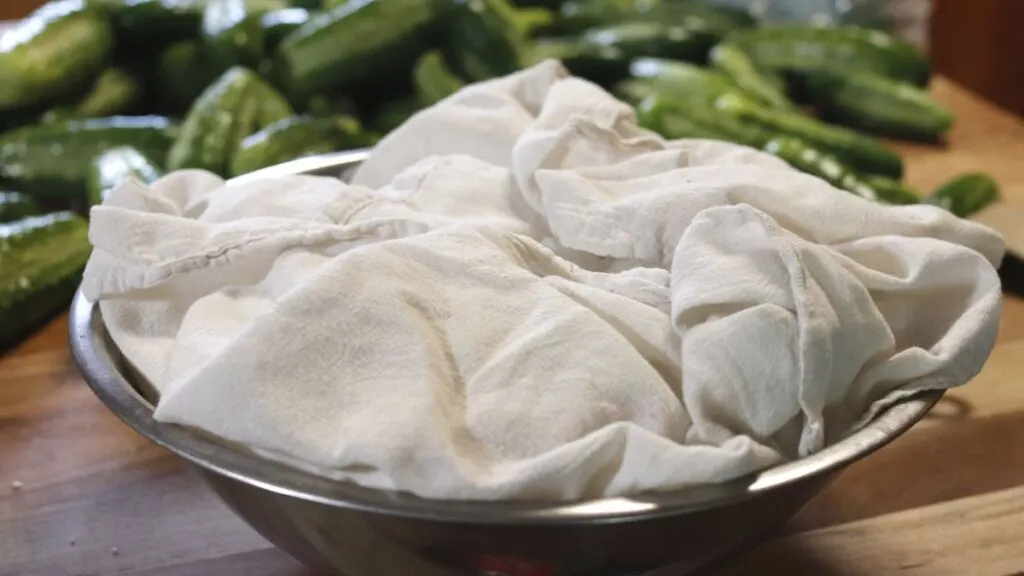
Icing and salting the cucumbers will help ensure that the pickles are crispy and not mushy. I go ahead and add the onions and garlic to the bowl, just like I do with my Granny’s bread and butter pickles. Put the produce in a large bowl and sprinkle with salt. Cover the bowl with a clean towel and put ice on top of it. I like to fold the ends of the towel that overhangs the bowl back into the bowl so water doesn’t drip on the counter as the ice melts. (see photos above) Let this sit for 3 hours.
Step 3: Prepare the canning equipment
While the cucumbers are being iced, prepare the canning equipment. Wash the water bath canner and fill it up about two-thirds of the way with water. Put the rack in the canner. Put the pot on the stove and heat over medium heat. You want the water hot but not boiling.
Wash the canning jars, lids and bands in hot, soapy water. The jars need to stay hot, so put them in the canner. The lids and bands do not need to be hot.
FIY: I’m always asked about the lids in my photos. I use Harvest Guard reusable canning lids for food that I probably won’t be gifting. They work a little different than metal lids, so if you get them be sure to read the instructions that come with them.
Step 4: Prepare the pickling brine
In a large pot, combine white vinegar and apple cider vinegar, sugar, mustard seeds, turmeric, cloves and red pepper flakes. Bring the mixture to a simmer over medium heat, stirring occasionally until the sugar dissolves completely.
Step 5: Rinse the produce
After the cucumbers have been under ice for 3 hours, remove the ice and towel and drain the water. Rise the cucumbers several times in cold water to remove excess salt.
Step 6: Combine produce and brine
Bring the brine to a boil. Add the rinsed cucumbers, onions and garlic to the brine pot and bring back to a boil. Boil for 90 seconds.
Step 7: Fill the jars
Fill the jars with the cucumbers and brine leaving a 1/4-inch headspace. I like to use a slotted spoon and divide the solids evenly among the jars, then ladle the brining liquid into the jars.
I add a grape leaf to each jar, but this is optional. We happen to have grapevines and the tannins in them help pickles retain their crispness, so I add it. I’ve forgotten many, many times and the pickles turn out great. So, if you don’t have access to grape leaves, don’t worry about it.
Using a bubble remover tool, remove the air bubbles from the jars. Recheck the headspace and add more brine if needed to maintain the 1/4-inch headspace.
Wipe rims of jars with clean, damp cloth. Add the lids and bands.
Step 8: Process jars
Put the jars into the water bath canner. Make sure that the water covers the jars by at least 1-inch. Cover the pot and bring to a boil over high heat. Once it reaches a rolling boil, start a timer and process for 10 minutes. The processing time is the same for pint jars and quart jars. I will say that unless your family just loves sweet and spicy pickles, I think canning these pickles in pints is better than having quarts of pickles.
Step 9: Cooling and storing the pickles
Remove the jars from the canner using a jar lifter and put on a towel on the counter. Let them cool overnight at room temperature.
In the morning, remove the bands and check the lids to be sure they all sealed. If any lid failed to seal, put the band back on and store it in the refrigerator. Wipe down and label the jars of pickles before storing in a cool, dark place.


Grab these free, printable canning labels to label your sweet and spicy pickles. Just fill out the form below.

Unlike refrigerator pickles, canned pickles can be eaten right away. Just know that the flavor will continue to develop over the next few weeks, which is why many people recommend that pickles be stored for a couple of weeks before eating. But we don’t have that much self-control.
Tried this recipe? Please leave a ⭐️⭐️⭐️⭐️⭐️ star rating in the recipe card below and/or a review in the comment section further down the page. We always appreciate your feedback. You can also save the recipe for later by pinning it or clicking on the heart in the lower right hand corner.
Sweet and Spicy Pickles


These sweet and spicy pickles s are easy to make and a great way to preserve the summer cucumber harvest.
Ingredients
- 3 pounds cucumbers
- 1 pound onion
- 1 head of garlic
- 1/4 cup canning salt
- 2 1/2 cusp white vinegar
- 1 3/4 cup apple cider vinegar
- 1 3/4 cups sugar
- 2 Tbsp. mustard seed
- 1/2 tsp. turmeric
- 4 whole cloves
- 2 tsp red pepper flakes
Instructions
- Start by washing the pickling cucumbers thoroughly. Trim off the ends of the cucumbers. Slice the cucumbers into rounds about 1/4-inch thick.
- Peel the onion and garlic. Slice the onion into 1/4-inch slices and leave the garlic cloves whole.
- Put the produce in a large bowl and sprinkle with the salt. Cover the bowl with a clean towel and put ice on top of it. Let this sit for 3 hours.
- While the cucumbers are being iced, prepare the canning equipment. Wash the water bath canner and fill it up about two-thirds of the way with water. Put the rack in the canner. Put the pot on the stove and heat over medium heat. You want the water hot but not boiling.
- Wash the canning jars, lids and bands in hot, soapy water. The jars need to stay hot, so put them in the canner. The lids and bands do not need to be hot.
- In a large pot, combine white vinegar and apple cider vinegar, sugar, mustard seeds, turmeric, cloves and red pepper flakes. Bring the mixture to a simmer over medium heat, stirring occasionally until the sugar dissolves completely.
- After the cucumbers have been under ice for 3 hours, remove the ice and towel and drain the water. Rise the cucumbers several times in cold water to remove excess salt.
- Bring the brine to a boil. Add the rinsed cucumbers, onions and garlic to the brine pot and bring back to a boil. Boil for 90 seconds.
- Fill the jars with the cucumbers and brine leaving a 1/2-inch headspace.
- Using a bubble remover tool, remove the air bubbles from the jars. Recheck the headspace and add more brine if needed to maintain the 1/2-inch headspace.
- Wipe rims of jars with clean, damp cloth. Add the lids and bands.
- Put the jars into the water bath canner. Make sure that the water covers the jars by at least 1-inch.
- Cover the pot and bring to a boil over high heat.
- Once it reaches a rolling boil, start a timer and process for 10 minutes. The processing time is the same for pint jars and quart jars.
- Remove the jars from the canner using a jar lifter and put them on a towel on the counter. Let them cool overnight at room temperature.
- In the morning, remove the bands and check the lids to be sure they all sealed. If any lid failed to seal, put the band back on and store it in the refrigerator. Wipe down and label the jars of pickles before storing in a cool, dark place.
- Use within one year.
Recommended Products
As an Amazon Associate and member of other affiliate programs, I earn from qualifying purchases.


Low temperature processing for pickles
I’ve always used the above canning process for pickles, however there is a lower temperature method for processing pickles. It’s a little finicky and takes a little longer, but the benefit of lower temperature processing is that it improves the firmness in homemade pickles. Here’s what the National Center for Home Food Preservation has to say about this method…
The following treatment results in a better product texture but must be carefully managed to avoid possible spoilage. Place jars in a canner filled half way with warm (120º to 140ºF) water. Then, add hot water to a level 1 inch above jars. Heat the water enough to maintain 180 to 185ºF water temperature for 30 minutes for pint or quart jars. Check with a candy or jelly thermometer to be certain that the water temperature is at least 180ºF during the entire 30 minutes. Temperatures higher than 185ºF may cause unnecessary softening of pickles.
https://nchfp.uga.edu/how/can_06/low_temp_pasteur.html
This method is easier to do if you have an electric water bath canner because it will keep the water at a constant temperature for you.
Commonly Asked Questions
Does this pickle recipe have to be canned?
No, but if you don’t can them, they won’t be shelf stable. Instead they will be sweet and spicy refrigerator pickles and will need to be stored in the refrigerator. This is a great way to put up a lot of garden cucumbers as quick pickles.
Can other vegetables be used besides cucumbers?
Yes, zucchini, summer squash and green beans all work really well in this recipe.
Can I use other spices?
Yes, you can change up any of the dry spices. You can use spices such as celery seed, black peppercorns, or a cinnamon stick.
Kris
Thursday 3rd of August 2023
Where does it state how many pints this makes?
Angi Schneider
Thursday 3rd of August 2023
Hi Kris, the yield (which is 6 pints) is noted in the upper right hand corner of the printable recipe card at the end of the article.