


Canning chicken is easier than you might think and so very versatile. You can use it for easy meals during the busy work week, a super easy chicken salad, or as a the base of a soup or chicken pot pie. Truly the possibilities are endless.

Why Can Chicken?
Besides the fact that home-canned chicken tastes great and is a great way to throw together a last-minute meal, canned chicken is shelf stable. While chicken freezes just fine, there is the possibility of the electricity going out for an extended period of time and ruining all your meat. That’s why I think it’s important to have some shelf stable cooked chicken in your home pantry.
We don’t raise our own chickens but if we did, I can see how pressure canning chicken would be a great alternative to freezing. Also, canning allows you to stock up on chicken and turkey when you find a great deal and not be limited by freezer space.
All poultry, including wild game such as duck and dove, can be canned with these instructions. I’ll be using chicken as the example, but just know that it can be replaced with any poultry.
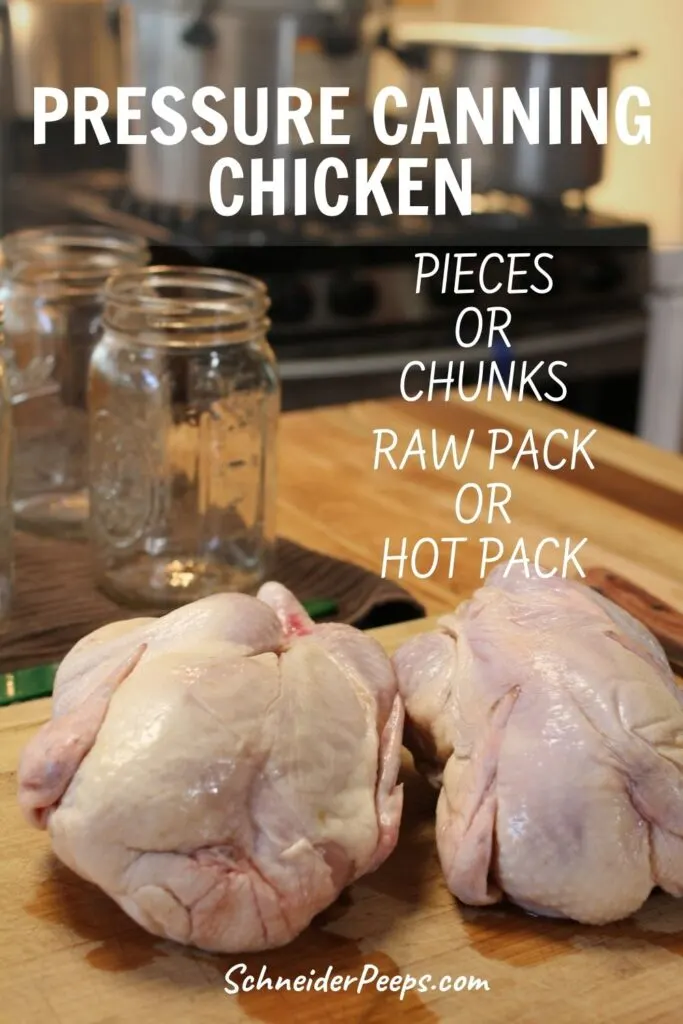
There are two canning methods for canning chicken – the raw pack method and the hot pack method.
Raw Pack Method – All ingredients go into the jar raw. The jars need to be washed in warm water but they don’t need to be heated. You’ll be putting cold chicken in them and don’t want them to crack from thermal shock. There is no need to add water or broth to the jars, the meat will make it’s own broth as it cooks while in the canner. The water in the canner should be about 140F when you put the filled jars into the canner for processing.
Hot Pack Method – All ingredients go into the jar cooked or partially cooked and hot. The jars need to washed and kept hot to avoid thermal shock. The water in the canner should be about 180F when you put the filled jars into the canner for processing.


Raw Pack Method for Whole Chickens
Chicken can be canned with or without the bones. Canning jars of bone-in chicken is probably my favorite way to can chicken. It’s easy to cut the chicken into pieces, put them in a couple of prepared jars, add salt and maybe some dried herbs and have a cooked whole chicken on the pantry shelf ready to use.
While it may seem like wasted space to can chicken still on the bones, the bones add more nutrition to the chicken and broth. While under pressure the bones release nutrients such as collagen, which is why the chicken broth will be gelatinous instead of liquid once the jars cool off.
Raw pack chicken is my favorite way to can chicken simply because it saves so much time up front.
Using a Whole Chicken for Canning
Always start with fresh chicken for canning. If you’ve purchased the chicken it needs to be canned by the “use by” date. It’s perfectly fine to freeze the chicken and then completely thaw it out and can it later if you don’t have time to can it when you purchase it.
If you’ve butchered and dressed the chicken, let it chill for 6-12 hours before canning. This will allow the rigor mortis to fade and the meat to relax.
Poultry should be kept cold until you’re ready to can it.
The skin can be left on the chicken for canning or removed. The skin will add more fat the jars. If the chicken has been pasture raised this extra fat can be a good thing since they tend to have less fat in the meat than commercially raised chicken does. If you purchased a large chicken and it seems to have quite a bit of excess fat, just trim it off.
The texture of canned chicken is different than when cooked fresh – it’s not bad, just different. Just like there is a difference in texture between white meat and dark meat or a difference between roasted, grilled or boiled chicken.
My personal opinion is that the white meat tends to be a little drier after canning so I’m not a fan of canning jars of chicken breast for our family. However, some people enjoy that texture and love canning chicken breasts.
Prepare the Equipment
The first thing you need to do to can whole chicken is to get your pressure canner, mason jars and canning lids ready. Chicken is a low-acid food and must be canned in a pressure canner. Please do not try to use a water bath canner and just increase the processing time – that can be very dangerous.
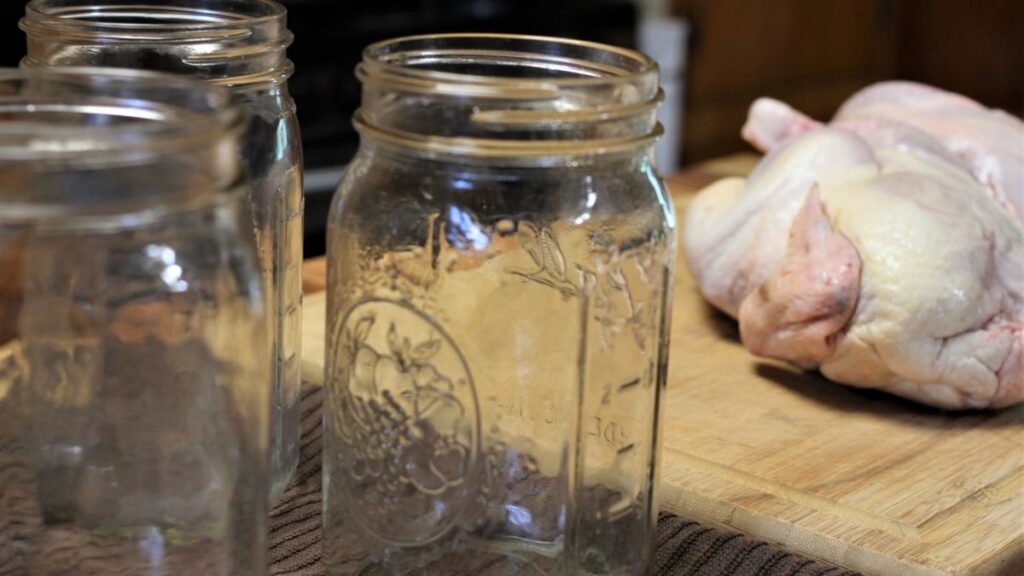
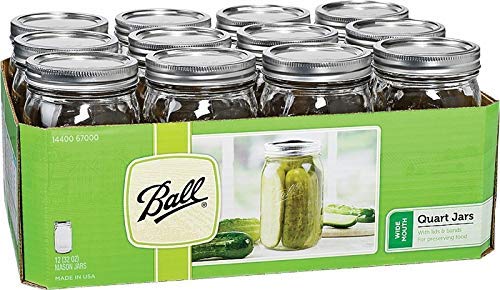
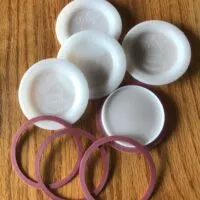
Wash the pressure canner, quart jars and lids in hot soapy water. Use wide mouth jars if you can, they will be easier to pack than regular mouth jars. I really like using reusable lids for canning chicken since I know I won’t be giving it away.
Add water to the pressure canner according to the manufacturer’s instructions.
The jars need to be kept warm, so put them in the canner while you prepare the chicken. Put the canner on the stove and heat over medium heat, the water should be about 140F and not boiling to avoid thermal shock.
After washing, set the lids aside, they do not need to stay hot.
Prepare the Chicken
Cut the whole raw chicken into pieces. I like to cut the leg and wings off with a knife and then use kitchen shears to separate the breast from the back. Sometimes I’ll separate the drumstick and thigh, and cut the breast in half, it just depends on how big they are.
I don’t add the back and spine to the jars, I save those to make broth later. Since the wings don’t have much meat, they can also be saved for broth instead of canning with the whole chicken.


Pack the Jars
Remove a jar from the canner and pack it with the pieces of chicken. I like to put a drumstick, thigh, breast and wing in each quart-size jar. You may need to arrange the pieces several times to get them to fit. You’ll want to pack them tightly. If the chicken is pretty large, you might not able to get half of it in one jar, that’s fine, just use another jar.
Add 1 teaspoon salt to each quart jar, if desired. You can also add any dry herbs you like to the jars, although most people avoid adding sage as it can get bitter while under pressure.
While there is no need to add water to raw packed chicken, there may not be enough natural juices in the chicken to fully cover the meat. Meat that isn’t fully covered may discolor but is perfectly safe to eat. Because I like the meat to be fully covered in liquid, I add a small amount, maybe 1/4 cup, of hot (not-quite boiling) water to my raw packed whole chicken.
Chicken is packed with a 1 ¼” headspace because it tends to swell. Use a bubble removal tool and remove any air bubbles, if you added water to the jar. If you didn’t add water, there won’t be any air bubbles to remove. If you don’t have a bubble remover, use a silicone spatula or chopstick – don’t use a butter knife as the metal can scratch the jar and weaken it.
Recheck the headspace – all the chicken (and water, if added) needs to be about 1 ¼” from the top of the jar.
Wipe the rims of your jars with a clean, damp cloth and put new lids and bands on the jars. Tighten the bands to fingertip tight, like you would a mayonnaise jar.


Process the Jars
Place the jars in the prepared pressure canner and lock the lid in place. Turn the heat up to high and when the canner starts venting, set a timer for 10 minutes. You can turn the heat down just a bit, it doesn’t need to be gushing out of the vent pipe but it does need to be a steady stream.
After 10 minutes, put the weight on the weighted-gauge canner, or the vent cover on the dial-gauge pressure canner, and bring it up to pressure. When the canner is at 10psi (adjusting for altitude, see section on adjusting for altitude below) set a timer for the correct processing time.
The processing times for canning poultry with bones and canning poultry without bones are different. Process the jars of poultry with bones for 65 minutes for pint jars and 75 minutes for quart jars. Process pints of boneless chicken for 75 minutes and quarts for 90 minutes. See chart below.
When the processing time is finished, turn off the heat and allow the canner to naturally depressurize. This will take 30-60 minutes. Refer to the instructions that came with your canner.
Once the pressure canner has depressurized, lay a clean towel on the counter to set the jars on. Remove the weight from the vent or open the petcock and let the canner sit for 10 minutes before opening the lid. This keeps the liquid in the jar from surging and lids being compromised.
When you remove the lid, remove it away from your face to avoid the blast of steam. Let the jars sit in the canner for another 5 minutes before removing them.
Using a jar lifter, remove the jars from the canner and place them on the prepared kitchen towel to cool. Leave at least 1” (2.5cm) space between the jars. Let them cool for 12-24 hours and then check the seals.
If everything has sealed, the jars are ready to be stored away. Remove the rings and wipe down each jar of chicken with a clean cloth with a little bit of vinegar on it. Label each jar with name and date. Use home canned poultry within one year.
If a jar didn’t seal correctly, put the jar in the refrigerator to use within a week. Unlike leftovers, it’s fine that the home canned chicken has been cooling at room temperature for 12-24 hours because any bacteria, yeast and mold spores have been destroyed by the canning process.
Raw Pack Method for Boneless Chicken
Many people like the convenience of canning boneless chicken instead of canning whole chicken, especially boneless chicken breasts. This way, you won’t need to mess with the bones or skin when you open the jar of canned chicken. Just be aware that breast meat is naturally less moist than chicken thighs, this is especially true if you use skinless chicken.
Follow the directions above for preparing the canning equipment and supplies. Unless you have a large family, it’s probably most convenient to can boneless chicken in pint jars instead of quart jars.
You can cut the chicken breasts into chunks or leave whole. When you pack the jars, pack the raw meat pieces loosely instead of tightly like you do with bone-in chicken. You don’t need to add any liquid, but there may not be enough natural juices to cover the chicken pieces. Like I said above, this is perfectly safe but the chicken will discolor over time. If that bothers you, you can add a little hot water or hot broth to each jar. You can add 1/2 teaspoon of salt to each pint jar and 1 teaspoon of salt to each quart jar.
Follow the instructions above for processing the jars. The processing time is the only thing that is different. Process pints of boneless chicken for 75 minutes and quarts for 90 minutes.


Hot Pack Method for Chicken
Hot packing chicken just means that you’re going to cook the chicken until it’s about two-thirds of the way cooked before packing the chicken in to jars. Although it seems like the chicken would get overcooked, hot packing actually results in a better finished produce than raw packing does. This is simply because the meat will be fully submerged under the liquid and won’t discolor.
While the actual canning process and times are the same for hot pack chicken and raw pack chicken, there are a few differences in preparing the chicken and packing the jars.
To prepare the meat, you can bake, steam, boil, sauté or rotisserie chicken to cook it. If you rotisserie a whole chicken, you’ll need to cut it into pieces while it’s still hot, so just be aware of that.
You’ll fill the hot jars with hot chicken pieces and hot chicken stock, broth or water leaving a 1 1/4-inch headspace.
The water in the canner needs to be hot, about 180F which is not quite boiling, before you put the filled hot jars in.
Follow the instructions above for processing the jars.


Canning Ground Chicken Meat
While there are instructions for canning ground meat from The National Center for Home Food Preservation, the instructions do not include ground chicken. Canning ground meat instructions are for bear, beef, lamb, pork, sausage, veal, and venison. In the poultry guidelines, there is no mention of canning ground poultry.
Adjusting Pressure Canning Processing Pressure for Altitude
For pressure canning, the time isn’t increased to adjust for altitude instead the pressure is increased. If you’re using a dial-gauge pressure canner, you’ll increase the pressure by 1psi for each 1000 feet above sea level. If you’re using a weighted-gauge pressure canner, you’ll increase the weight by 5psi for elevations higher than 1000 feet above sea level. You can use the chart below for a quick reference. However, it’s best to check the instructions that came with your pressure canner.
Tried this recipe? Please leave a ⭐️⭐️⭐️⭐️⭐️ star rating in the recipe card below and/or a review in the comment section further down the page. We always appreciate your feedback. You can also save the recipe for later by pinning it or clicking on the heart in the lower right hand corner.
Pressure Canning Chicken


Safely can chicken and fill your pantry with tasty home-canned chicken. You can use it for easy meals during the busy work week, a super easy chicken salad, or as a the base of a soup or chicken pot pie. Truly the possibilities are endless.
Ingredients
- 3 whole chickens
- 7 teaspoons salt
Instructions
- Wash the pressure canner and the racks. Fill the pressure canner with about 3 inches of water (refer to the manufacturer's instructions for how much water to use in your canner.)
Put the rack in the bottom of the canner and put the canner on the stove. Heat the water until it's hot but not boiling - about 140F for raw-packed jars and 180F for hot-packed jars. - Wash the jars in hot, soapy water. The jars don't need to be sterilized but they need to stay hot if you are doing the hot pack method.
- Wash the lids and set aside
- Cut the chicken into pieces.
- If you're doing the hot pack method, cook the chicken until it's about 2/3 done. Save the drippings to add to the jars.
- Put the prepared chicken into the prepared jars. If you are raw packing, there is no need to add water or broth to the jars. However, you can add a bit of water to ensure that there is enough liquid to fully covered the canned chicken. If you are hot packing, add hot broth, hot water or drippings to the jars.
- Put 1 teaspoon salt into each quart-size jar and 1/2 teaspoon salt into each pint-size jar.
- Leave a 1 1/4 inch headspace.
- Using a bubble removal tool, remove the air bubbles from the jars, if you added liquid to them.
- Wipe the rims of the jars with a clean, damp cloth.
- Put the lids and bands on the jars and tighten to fingertip tight (about how you'd put a lid on a jar of mayonnaise).
- Put the filled jars into the canner and lock the lid onto the canner. Follow the directions that came with your canner for venting and bringing your canner up to pressure.
- Process the jars at 10psi adjusting for altitude, if needed.
Bone-in chicken will be processed for 65 minutes for pint-size jars and 75 minutes for quart-size jars.
Boneless chicken will be processed for 75 minutes for pint-size jars and 90 minutes for quart-size jars. - After processing, turn off the heat and let the canner completely depressurize before removing lid.
- Remove the jars from the canner, and let them cool on the counter overnight.
- Check the seals. If any jars didn't seal, but them in the refrigerator to use first.
- Wipe the jars with a clean cloth with vinegar on it, label the jars and store in a cool, dry place.
Recommended Products
As an Amazon Associate and member of other affiliate programs, I earn from qualifying purchases.


More Canning Chicken Recipes
You can find more recipes for canning chicken in my book, Pressure Canning for Beginners and Beyond. You’ll also find instructions and recipes for canning meat, wild game, vegetables, tomatoes, and legumes.