Simple syrups are a great way to add flavor to drinks, yogurt, pancakes, ice cream, or as a grenadine substitute, really anything that needs a little something. My current favorite simple syrup is hibiscus syrup, made with the calyx of hibiscus sabdariffa, also known as Roselle and Jamaican sorrel.


To make hibiscus syrup you just need hibiscus, water, and honey or sugar.
You can find hibiscus in many grocery stores, especially if they have an international section. If you can’t find it locally, you can order it online.
However, edible hibiscus super easy to grow and grows as an annual in many areas so consider adding it to your garden next year.


You can use either honey or sugar to make simple syrup. If you use raw honey, you’ll want to let the hibiscus water cool before mixing in the honey so the beneficial enzymes aren’t destroyed by the heat.
I like the tartness of the hibiscus syrup to shine through so I make a very light syrup and only use 1/2 cup of sugar for 3 cups hibiscus water. A heavy syrup would be equal parts sugar and hibiscus water. You can use any amount you want. I recommend starting with 1/2 cup and then adding a little more if you think it’s not sweet enough.
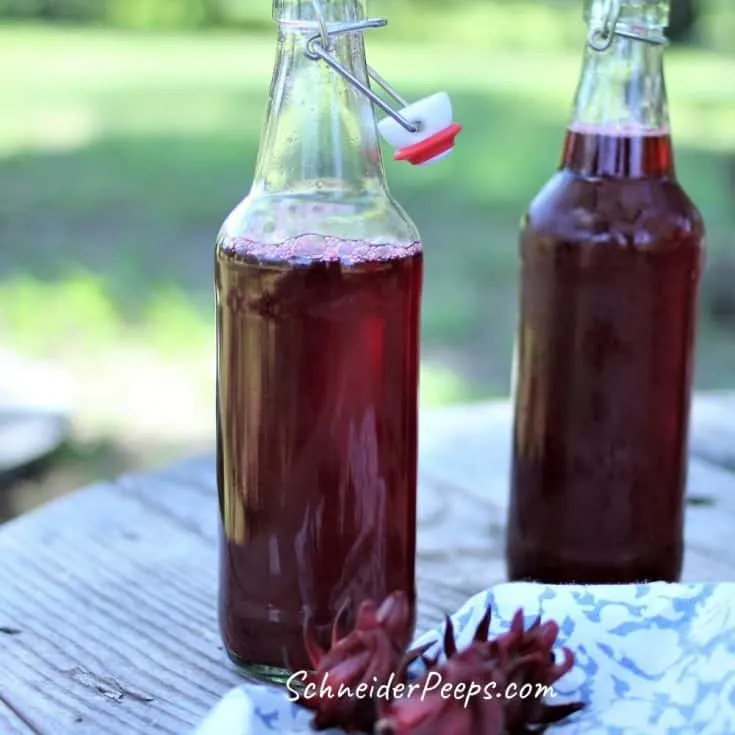
You can store the hibiscus simple syrup in small mason jars but I really like to put it into reusable soda bottles because they’re easier to pour from.
Simple Hibiscus Syrup

Hibiscus simple syrup is a tangy, floral syrup that is great for adding to drinks, pouring on pancakes, or topping ice cream.
Ingredients
- 3 1/2 cups water
- 20 fresh hibiscus calyx (or 25g dried)
- 1/2 -2 cup s sugar
Instructions
- Put the water In a medium stockpot and bring it to a boil.
- If using fresh hibiscus calyx, remove the outer calyx from the seed pod and put the calyx in the pot. If using dried hibiscus, add it directly to the pot.
- Once the water is boiling, reduce the heat to a simmer and simmer for 20 minutes.
- After 20 minutes, pour the hibiscus water through a mesh strainer to strain out the solids.
- Put the hibiscus water back into the pot, add the sugar, and bring it to a boil. The longer you boil the syrup the thicker it will get. I usually let it it boil about 5-10 minutes.
- Remove the pot from the heat and let the syrup cool.
- Pour syrup into clean jars and store in the refrigerator for up to 6 months.
Notes
I only use 1/2 cup sugar in my simple syrup because I like the tartness of the hibiscus to shine, however, you can as much sugar as you want.
If you have and abundance of hibiscus, here are over 30 recipes for hibiscus tea and other hibiscus treats for you to try.


Do you make flavored simple syrups? If so, what flavors do you make?
Christine
Tuesday 29th of June 2021
I make Hibiscus wine, tea and jelly. Looking forward to making the syrup this year. I grow my own from the seeds I save from the pods.
Angi Schneider
Thursday 1st of July 2021
Those sound fantastic! Thanks for sharing!
Kelly
Sunday 15th of November 2020
I am loving your articles about the hibiscus 🌺 tea and now this. Question. Can you can/preserve this? Also if you can, how long would it last that way in a cool dark place?
Angi Schneider
Monday 16th of November 2020
I haven't preserved this yet but I know flavored simple syrups can be canned. Most of the recipes from reputable sources have equal amounts of sugar and liquid so I would add more sugar to the recipe to make a 1:1 ratio. You'll process in jars with a 1/4" headspace for 10 minutes adjusting for altitude if necessary.