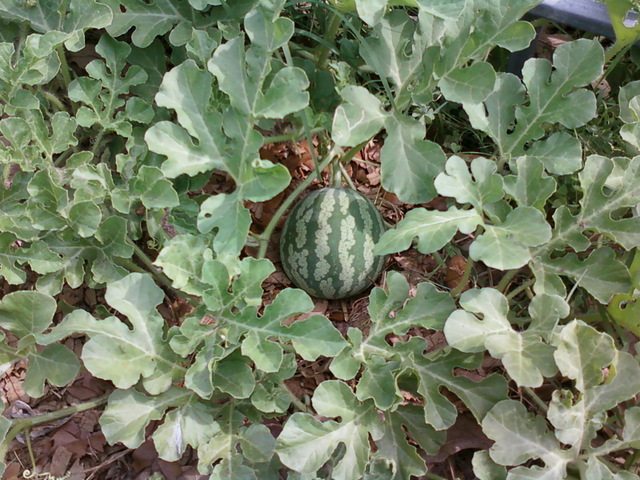
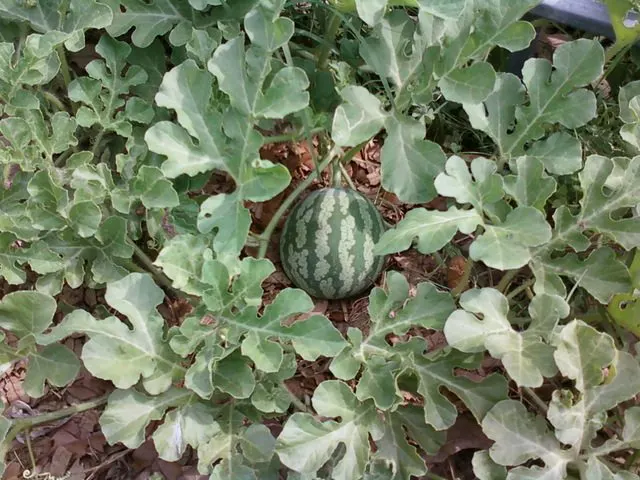
When we planted our Roma tomatoes this year we put some of last years compost in the bed. For all the other beds we used aged hay from a friend’s horse and goats. By the time we planted the Romas we were out of farm “stuff”. I had started my Romas from seed and a friend had also given me some. Imagine my surprise when hundreds of melon plants started popping up in my tomato bed! Apparently someone put melon seeds in the compost bin – a no no here. We moved our Romas and let the melons take over – after thinning lots of them. They are watermelons and look really good. There’s even a few and a yellow squash growing in the compost bin. We’ve just let them take over and moved our pile. Why is it that volunteers always seem to do better than the plants I actually plant?
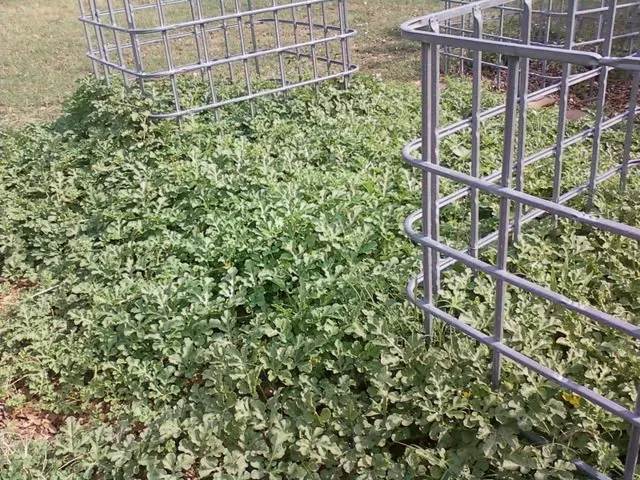
We have only had mild successes with melons in the past but I’m hoping this year will be different. We installed our homemade drip irrigation system in the melon patch. (that would be milk jugs with holes them that we buried) We also planted some honeydew melon and cantaloupe in our onion patch. The onions should be harvested before the melons get too big.
Here’s some info on growing melons:
Melons do just fine direct seeding in the garden.
Plant in hills (this helps you know where your seeds are!)
Plant 3 seeds per hill and then thin if needed. (If you make your hills large enough you might not have to thin)
Keep well watered, plants will live for a long time with not much water, but either they won’t produce any fruit or the fruit will be hard. This is especially true for watermelons – they need lots of water
If you plant transplants, plant a few seeds too. That way you’ll have older and younger plants.
Do not water the leaves, just the soil (this is where the milk jug come in handy)
Cucumber beetles – you will find these in the flowers. Squish them.
Squash bugs – like to be at the base of the plant. They will climb up the stem to lay their eggs. You can try putting a board at the base of the plants at night and then in the morning lifting it up to find the squash bugs.
Squash bugs lay their eggs on the underside of the leaves (they are orange-ish colored). again – squish them or if you just can’t do it, pull off that leaf and burn it.
Powdery mildew – is a white mildew that will attack the leaves of squash, melons and cucumbers. It is caused by too much moisture on the leaves and is spread by bugs. We try to cut off infected leaves and burn them. Last year we had a hard time with this and are changing the way we water to hopefully avoid it this year.
You can put a paper plate under your melons (and winter squash) to keep them up off the ground to help keep the bugs off the fruit. I did this last year after reading Animal, Vegetable, Miracle by Barbara Kingsolver. When we picked our water melons when the vines died very few were ripe. This year I think I’ll try black plates instead to help attract the sun.
Harvesting and Storing:
Its hard to know when to harvest melons. I’ve heard of people thumping them, waiting for the underside to be a certain color, waiting for the vine to die, all kinds of tricks. We’ve found it is usually just trial and error. We try to wait as long as possible and then just eat lots of melon. We’ll eat the cantaloupe and honeydews first and then the watermelons as the watermelons seem to last a little longer than the others.
My favorite book on bugs is Howard Garrett’sTexas Bug Book an amazing book with tons of pictures and remedies.
If you have any more tips for growing melons, please share them in the comments.
I love your blog! Burying the jug is a GREAT idea; I've been using jugs with holes in the bottom to do slow-release watering, but burying them seems like less work in the long run.
Great melon advice - I have never had luck with watermelons!
Thanks for visitng my blog! I responded to your comment but also wanted to post here about the portable cow shelter. If you use something similar for your tomatoes, you could just put rebar in the ground and arc the PVC pipes over the plants using the rebar as anchors instead of carriage bolts (the bolts were unfortunately a little pricey at $4 each).
The Schneiders
Wednesday 25th of May 2011
For ou squashes and melons we use one jug per hill. We make a hill about 3 feet across and then dig a hole in the middle to put the jug, kind of like a volcano. We poke about 25 holes in each side of the jug and 5-10 on the bottom with a finishing nail. This is where teenage boys come in handy! We plant 3 seeds about 4-6 inches out from the jug.
For our tomatoes, we used one jug per cage and then planted 4-6 plants in the cage. That's what we did here - and then had to move our tomatoes but we kept the cages where they were.
Diana
Wednesday 25th of May 2011
How many milk jugs do you use, and how close together do you put them? I love that idea! And I've never grown watermelons, but yours look great :)


Greenacresmama
Thursday 26th of May 2011
I love your blog! Burying the jug is a GREAT idea; I've been using jugs with holes in the bottom to do slow-release watering, but burying them seems like less work in the long run.
Great melon advice - I have never had luck with watermelons!
Thanks for visitng my blog! I responded to your comment but also wanted to post here about the portable cow shelter. If you use something similar for your tomatoes, you could just put rebar in the ground and arc the PVC pipes over the plants using the rebar as anchors instead of carriage bolts (the bolts were unfortunately a little pricey at $4 each).
The Schneiders
Wednesday 25th of May 2011
For ou squashes and melons we use one jug per hill. We make a hill about 3 feet across and then dig a hole in the middle to put the jug, kind of like a volcano. We poke about 25 holes in each side of the jug and 5-10 on the bottom with a finishing nail. This is where teenage boys come in handy! We plant 3 seeds about 4-6 inches out from the jug.
For our tomatoes, we used one jug per cage and then planted 4-6 plants in the cage. That's what we did here - and then had to move our tomatoes but we kept the cages where they were.
Diana
Wednesday 25th of May 2011
How many milk jugs do you use, and how close together do you put them? I love that idea! And I've never grown watermelons, but yours look great :)