It’s interesting living in two worlds – one being the world of teenagers and adult children and the other being the world of preshoolers. In some ways, the worlds are so very different and, in some ways, remarkably similar. I’ve also noticed that the preschool world that Esther lives in is different than the preschool world my older children lived in. I’m not sure its all better, either.
One thing that I’ve noticed (and I feel like I really need to guard against) is that if we’re not careful, Esther could have some kind of electric device in front of her face all day long. Back “in the day” if one of our children wanted to play an electronic game we would have to set them up at our desktop computer and put a disk in. Now, we can just whip out the phone (well, not my dumb phone) or an ipod – we don’t have to be home or even inside. Our children can entertained, or distracted or “kept busy” all day long. It’s not a good thing.
There are games and apps that can do anything. Don’t want to get the kitchen messy with finger paints? There’s an app for that. Want to teach your children responsibility of taking care of animals? There’s an app for that. If these are the main experiences that kids have for painting or learning responsibilty, we’ve done them a disservice.
So, in order to limit the tempation to keep Esther “entertained” when we’re out and about, I made her a crayon tote bag. And I took photos so you could make one too. I bet it will only take an hour, so get some fabric, get your machine out and start sewing. You’ll be glad you did.

Supplies
1 yard of fabric – you can use 1/2 yard of two different patterns
thread
sewing machine
chalk

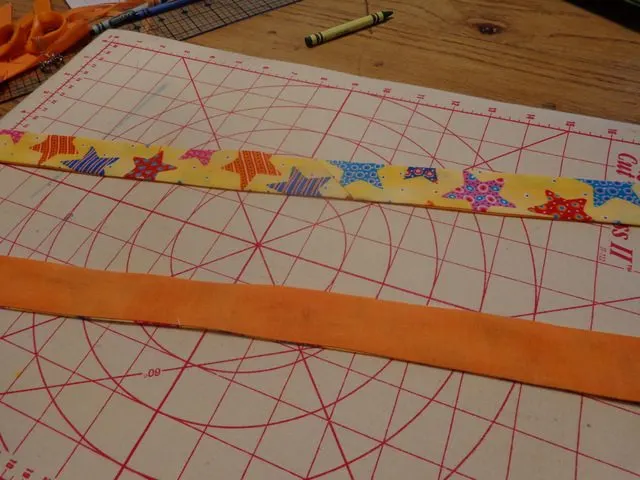
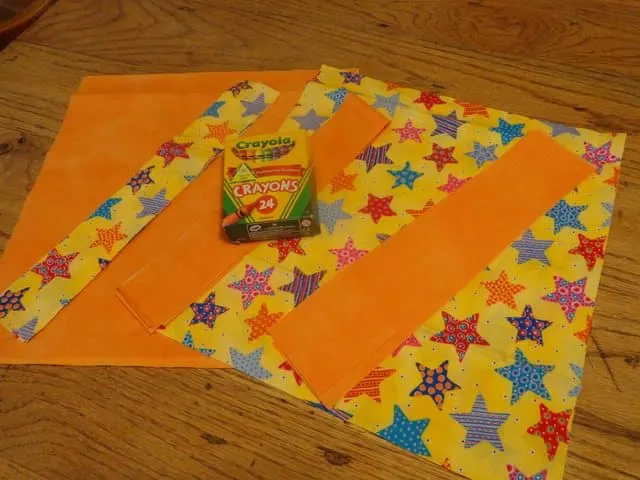 Cut your fabric. You need 4 pieces that measure 12″X13″ (body of the bag) , 4 pieces that measure 2.5″X 22″ (straps) and two peices that measure 5″X12″ (crayon holders)

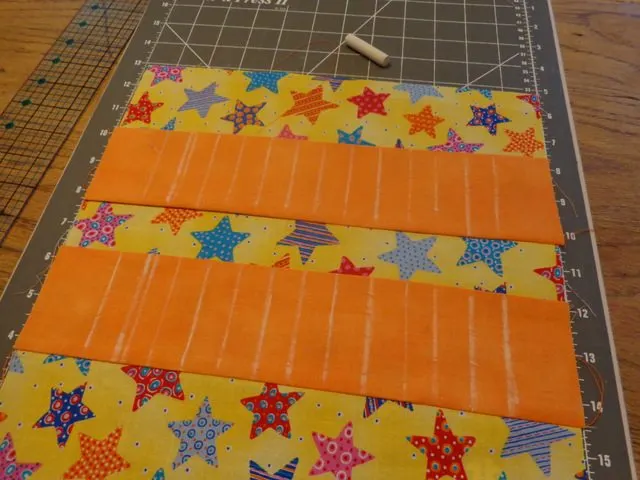
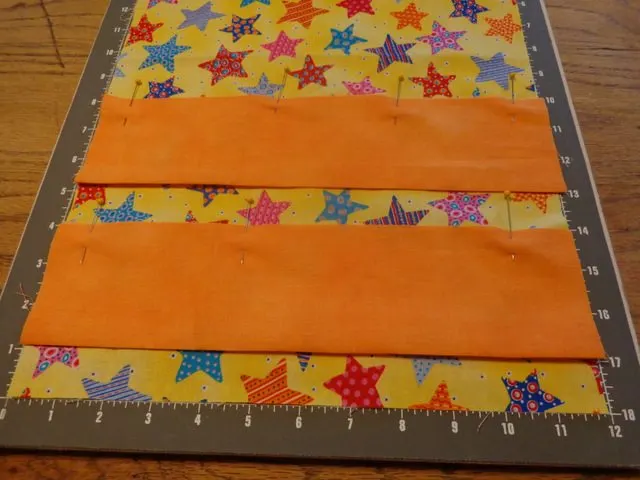 Fold each of the 5″X12″ peices in half lengthwise so each piece is now 2.5″ X 12″. Pin one 2.5″X12″ piece four inches up from the bottom of the on the front piece. Then pin the second one eight inches up from the bottom. Make sure the raw edges are closer to the top and the folded sides are closer to the bottom.

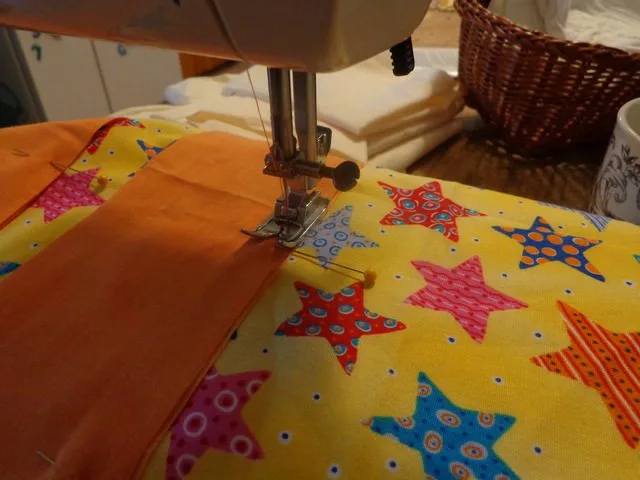 Using a quater inch seam (just line the fabric up with the right edge of your foot) stitch the raw edges to the front of the bag.
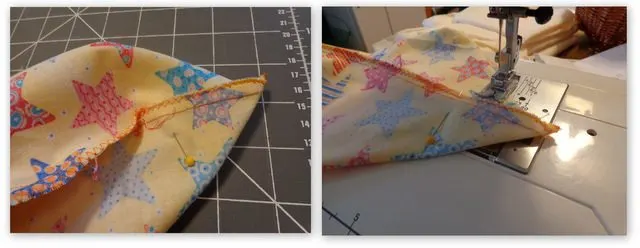
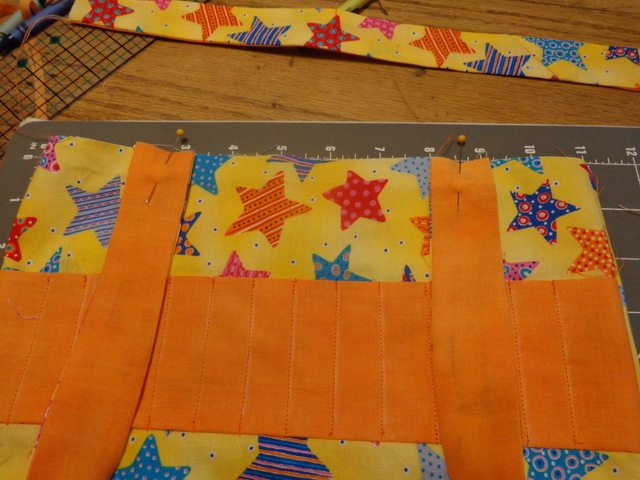
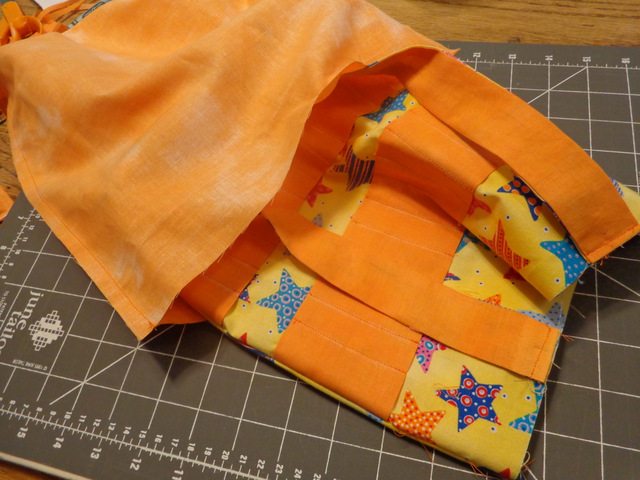
 The front should now look like the photo on the left – the crayon holder are like little flaps. Fold those flaps up and iron the seam.
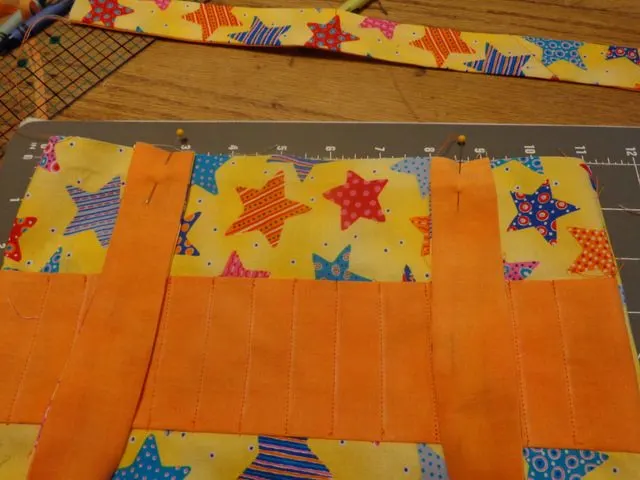
 Now, measure in 1.5″ from each side and make a line with a piece of chalk. You can get all fancy and use a fabric chalk pencil or you can do what I did and just grab a piece of chalk off the kid’s chalkboard. Now, make 11 more lines 3/4″ apart between the two you already made. They don’t have to be perfect but if you notice that one is much bigger than the others, just adjust it.
Next, stitch over the chalk lines to make your crayon pockets. Be sure to back stitch at the beginning and ending of each line to lock in your stitches.

 Lay the other outside bag piece on top of the first one with the right sides of the fabrics together. Pin both sides and the bottom. Leave the top open. Stitch the 3 sides.

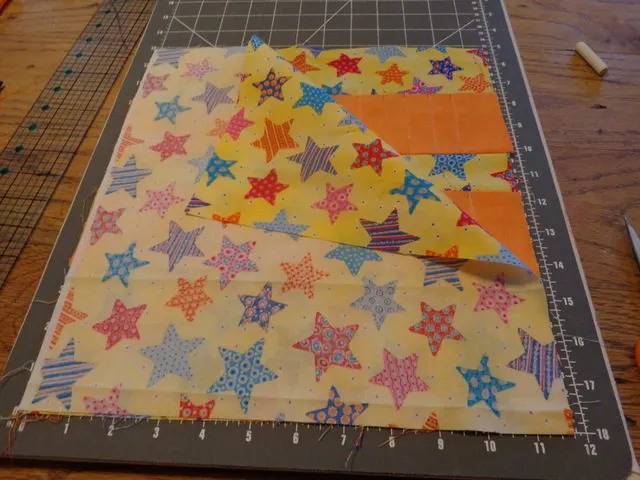
 I really like the look of boxed corners so I did that on our bag. All you do is line up the side seam to the bottom seam and it will come to a point. Pin it down like I did in the photo. Now stitch to make a triangle on the end. I just line up the edge of the fabric (where the point is) on the edge of the silver part of my machine and do that for each side. I know, it’s very technical….
Now, you’re going to make the lining by putting the two 12″X13″ pieces right sides together and stitching around both sides and the bottom, leaving the top open and then box the corners. However, DO NOT sew about four inches of the bottom of the lining. You want a hole in the bottom of the lining – trust me, it’s important.
 Now to make the straps, and let me apologize right now for not having photos of this process. I was supervising dinner preparations while I was making this. Probably not a good combo. But you guys are sharp, so I’m sure you’ll be just fine. If you need photos, I have them on this post, but instead of using two pieces of fabric I used one wide piece and folded it in half.
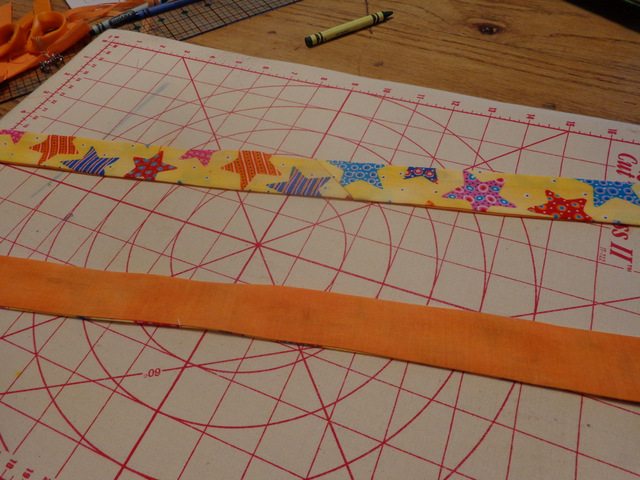
Put 2 of your strap pieces right side together and stitch down each long side. Do the same with the two other pieces. I chose to have my straps two different fabrics you don’t have to. Once that is done, start turning the end of one side down and start pulling the insides out. When all the insides are out, lay the piece out and iron it flat.
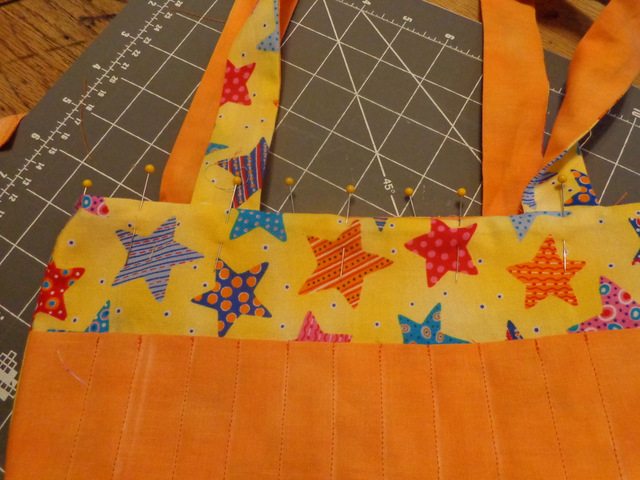
 Now, take the outside of your bag and turn it right side out. Take one strap and pin it about 2″ in from each side. Make sure you only pin it to the one side – your top should still be open. Then pin the other strap to the other side.

 Stitch the straps down – all four edges – and pin the strap out of the way so it’s no hanging loose.
 Now, take the lining which is still inside out and put the outside of the bag in it. Pin the lining to the bag all around the top. Now, stitch around the top opening – there should still be an opening ;-).

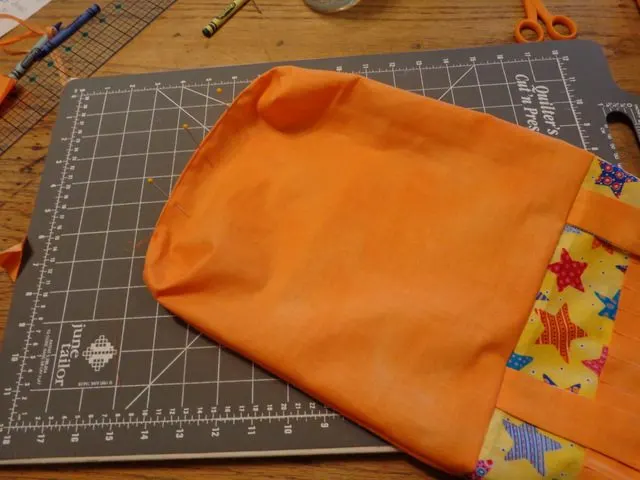 This is where that hole in the bottom of the lining comes in, pull the bag out through the hole in the lining. I know, it’s weird but do it. You should end up with something like the photo above. Tuck the raw edges of the hole in and stitch the hole up. (I already stitched when I remembered I needed a photo.)
After the hole is stitched, push the lining into the bag.
 You can iron the bag opening, but I like to pin the lining down and top stitch (1/4″ seam or less)around the opening.
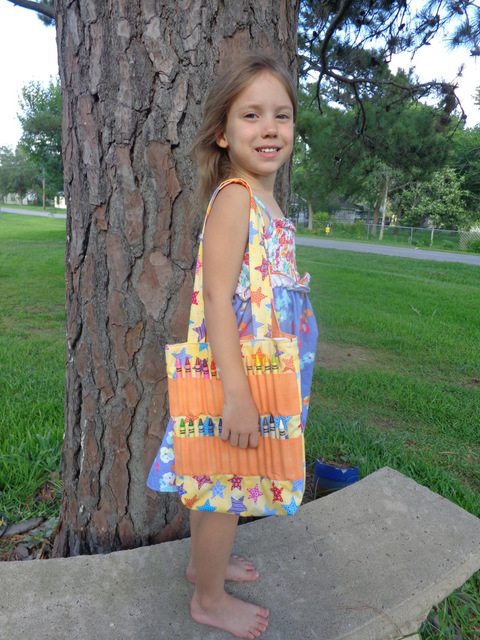
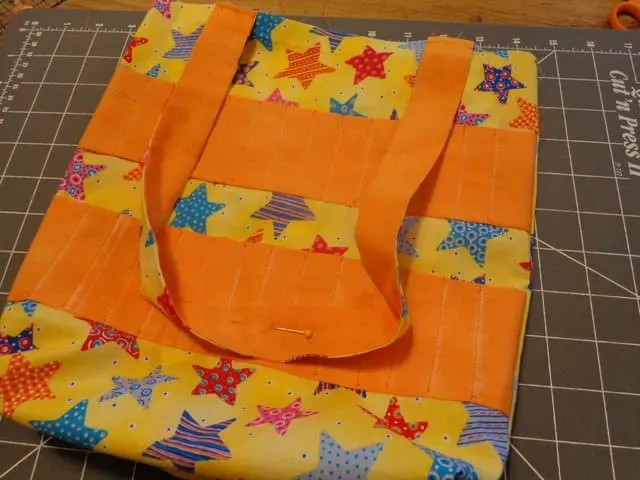
 Fill with crayons and…
Enjoy!
Tell me, do you struggle with the amount of electronic use your kids have available to them? How do you balance that?
DIANA L JONES
Thursday 31st of October 2019
I was just starting to make the crayon bag and I simply do not understand why there would be raw edges showing on the crayon holders. I am totally confuse. Diana Jones
Angi Schneider
Monday 4th of November 2019
Hi Diana, there aren't any raw edges showing on the crayon holders, once the bag is complete. The 5X12" pieces get folded in half so they are 2.5"X12". The raw edge is sewn to the front of the bag and then flipped up to enclose the long raw edge. The raw edges on the sides are enclosed in the seam allowance of the bag. Hope that helps.
Jean P
Monday 18th of December 2017
I DO NOT SEE WHERE YOU SEWED THE SLOTS FOR THE CRAYONS. WHEN DO YOU DO THAT?
Angi Schneider
Monday 18th of December 2017
Hi Jean, you'll stitch over the chalk lines after you mark them, before sewing the two bag pieces together. I've added that step into the tutorial. Thanks for catching that!
Gerry Berry
Sunday 18th of December 2016
Why can I not print the instructions for this crayon tote bag. I plan to make it for my great grandchildren for Christmas.
Angi Schneider
Sunday 18th of December 2016
Hi Gerry, You can highlight all the text and then print "selected text." I don't have this as a printable pattern at this time.
Gerry Berry
Sunday 18th of December 2016
I do not understand computers so any help is appreciated. Is there anywhere that I can purchase the pattern.
Marsha
Saturday 10th of December 2016
I just finished making one for my darling granddaughter; I used fusible batting to give the bag more body. The next one I make (for grandson) I think I'll use fusible batting or interfacing in the straps. But I'm real pleased with how it turned out! Good tutorial! Need to get a bigger box of crayons, though!
Angi Schneider
Monday 12th of December 2016
Great suggestions! Thanks for sharing them.
andrea stewart
Wednesday 1st of June 2016
Question-Have you used a light weight batting to give the bag more body?
Angi Schneider
Wednesday 1st of June 2016
Hi Andrea, I haven't but but you could certainly try it. If you do, let me know how it turns out!