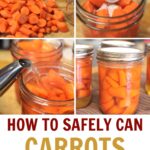
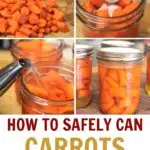

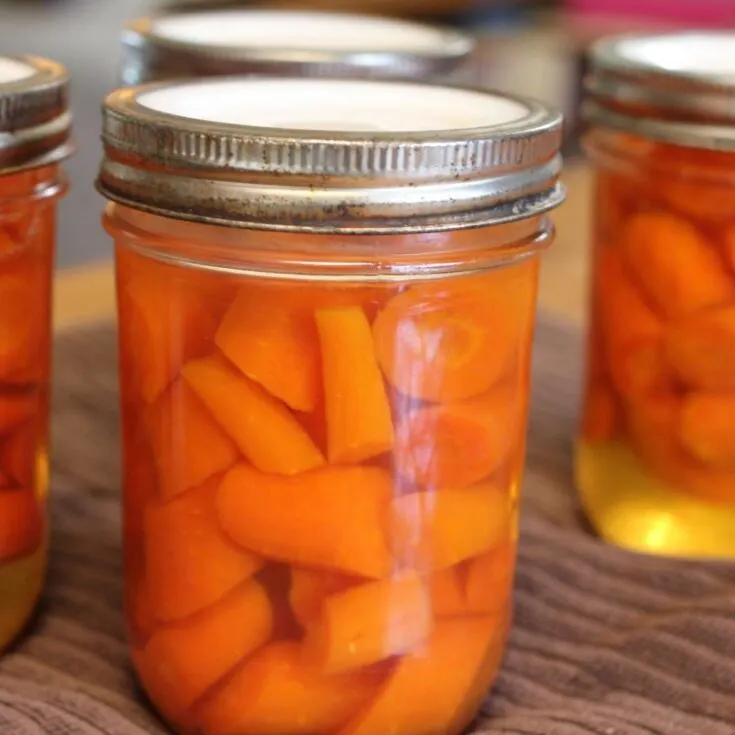
Canning carrots is an easy and versatile way to preserve the harvest at the end of the season and stock your pantry. Canned carrots are a little soft, but the flavor is fantastic – pressure canning carrots seems to intensify the carrot’s flavor.
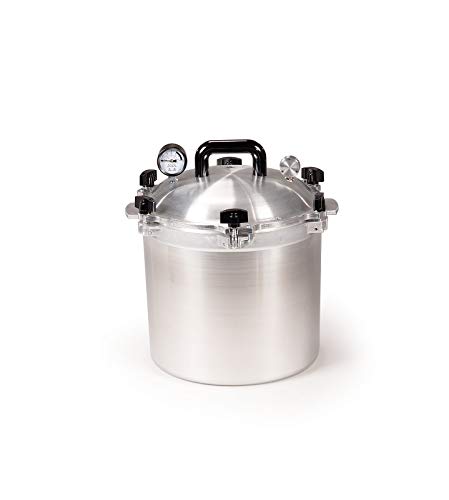
A pressure canner is required to safely can carrots at home.

Carrots seeds can be a little fussy about germinating but once they do, they grow great! We grow carrots over the winter months in our area. For the most part, we harvest and eat them as needed but at the end of the season we pull all the remaining carrots and preserve them.
We use some of the greens to make carrot top pesto and dehydrate the rest to add to our “super food green powder.” We use some of the carrots to make spicy carrot cake jam and the rest gets pressure canned to use for meals. The carrot top pesto and spicy carrot cake jam recipes are in The Ultimate Guide to Preserving Vegetables. If you want to learn how to preserve vegetables by canning, dehydrating, freezing and fermenting, plus use all the edible parts, you need this book.
Preparing Carrots for Pressure Canning
Before pressure canning, carrots should have the greens removed. They should also be washed, peeled, and cut. Because carrots are a root vegetable they have a higher chance of having botulism spores on them (the spores, which are harmless until activated, thrive in soil), they really need to be peeled before canning.
I realize that some people don’t peel root vegetables before canning and “haven’t killed anyone”….yet. But to me it’s not worth the risk. You can use the peels for making broth or dehydrate them and make a carrot powder to cook with. You can also feed them to the chickens. There’s no need to waste them but there’s also no reason to not peel the carrots.
It will take about 17 pounds of carrots (without the greens) to fill 7 quart-size jars which is number of jars most pressure canners will hold.
Raw Pack vs Hot Pack
There are two different methods that you can pack the jars for canning carrots – raw pack and hot pack. Both methods require clean, hot jars and peeled, sliced carrots.
Raw-pack means that you’ll put the carrot pieces into the hot jar and pour boiling water over them leaving a 1″ headspace.
Raw-packing is definitely faster but you might end up with carrots floating after they’ve been canned. As long as the jars sealed, there is absolutely nothing wrong with floating carrots. There is air trapped inside raw fruits and vegetables, the more air inside the produce, the more float.
Because of this, I take my time removing the bubbles before I put the lids on the jars. The hot water pushes air out of the produce and reduces float.
Hot-pack means that you’ll put the carrot pieces into a pot of boiling water and boil them for 5 minutes. Then pack the hot carrots and water into hot jars leaving a 1″ headspace.
Because hot carrots are more flexible than raw carrots, you’ll be able to pack more carrots into each jar. This reduces float and means you’ll need fewer jars.
While there are some fruits and vegetables that really are best when they’re hot-packed, carrots are not one of those vegetables. Both ways turn out great end products.
One word of caution…when you heat the water in the canner, it should not be boiling, it only needs to be hot. If it’s boiling you risk having the jars break from thermal shock. This is especially true if you use the raw pack method. The recommended water temperature is 140F for raw packed jars and 180F for hot packed jars. The water should be too hot to put your fingers in but not boiling.
How to Pressure Can Carrots
If you are new to pressure canning, or just want to improve your pressure canning skills, I highly recommend Pressure Canning for Beginners and Beyond (release date: August 24, 2021). In this book, I give step by step instructions for pressure canning beans, meats, vegetables, soups and meals in jars.
Step 1: Prepare the Canner
Wash the pressure canner and the racks. Fill the pressure canner with about 3″ of water (refer to the manufacturer’s instructions for how much water to use in your canner.)
Put the rack in the bottom of the canner and put the canner on the stove. Heat the water until it’s hot but not boiling – about 140F for raw-packed jars and 180F for hot-packed jars.
Step 2: Prepare the Jars and Lids
The jars and lids should be washed in hot, soapy water. While washing the jars, look for any nicks or cracks along the rim. Don’t use any jars with nicks or cracks in them. The jars don’t need to be sterilized but they need to stay hot, therefore, I put the jars in the pressure canner with the hot water while I prepare the carrots.
Ball/Kerr no longer recommend that their lids be hot before using, other manufacturers do recommend the lids be hot. I suggest reading the instructions on the box of lids because the recommendations can change.
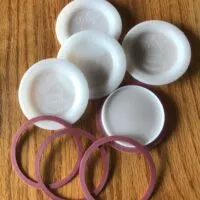
Since carrots are something I can just for our family and not to give as gifts, I use reusable canning lids for canning carrots. I use both Harvest Guard lids and Tattler lids; they both work well, but you need to read the instructions because they work a little differently than metal lids.
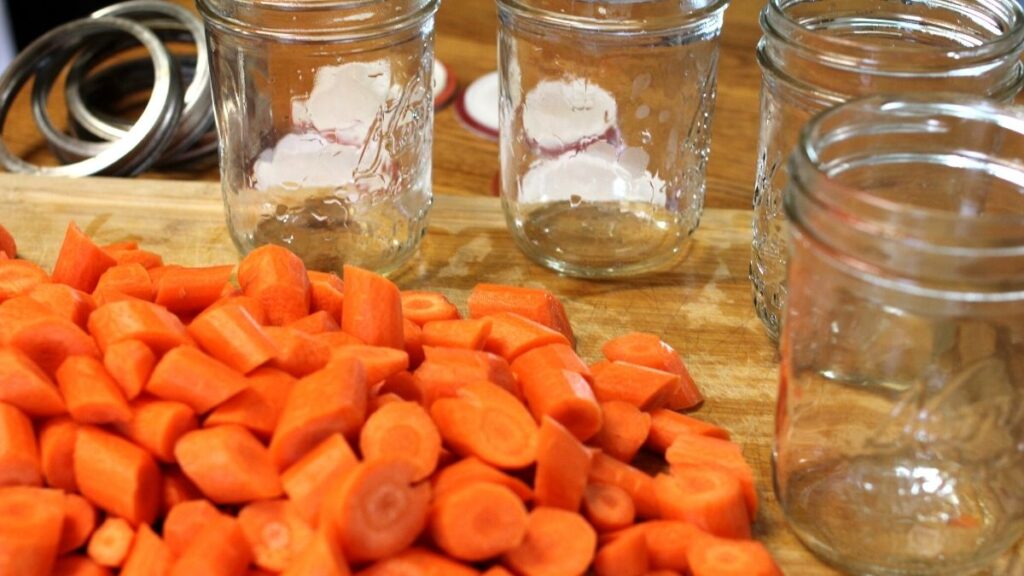

Step 3: Prepare the Carrots
Wash, peel, and cut the carrots. You can cut them in sticks, chunks, or slices. If you’re going to cut them in slices, they really need to be at least 1/4″ thick. Carrots get soft when canned and really thin slices can fall apart when you’re reheating them for serving.
If you are hot-packing the jars, put the carrot pieces in a stockpot of water and bring to a boil. Boil for 5 minutes.
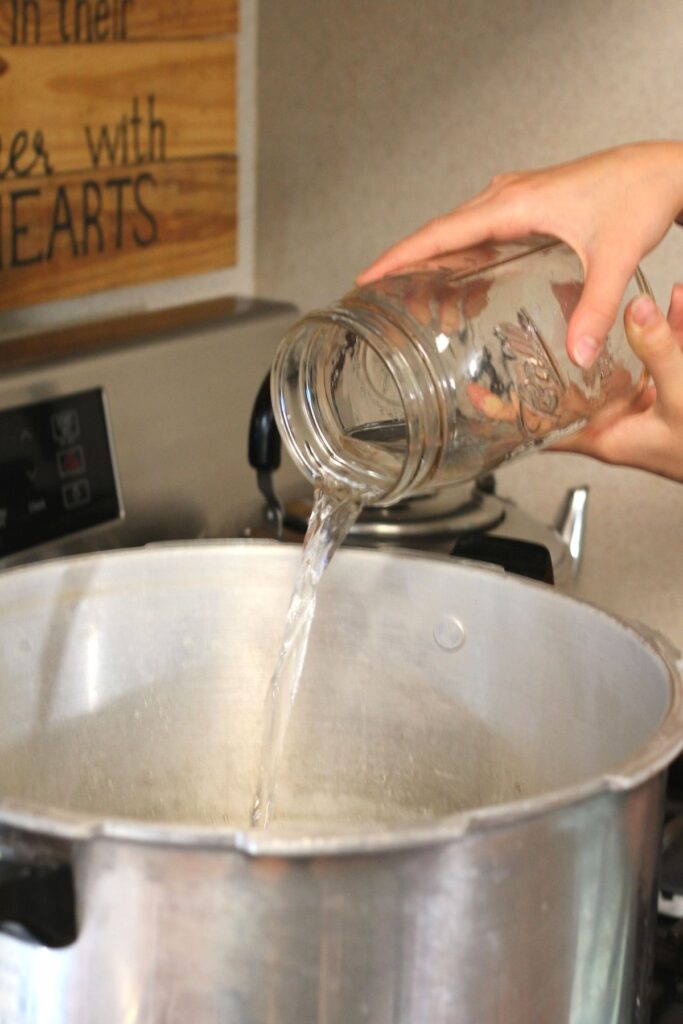
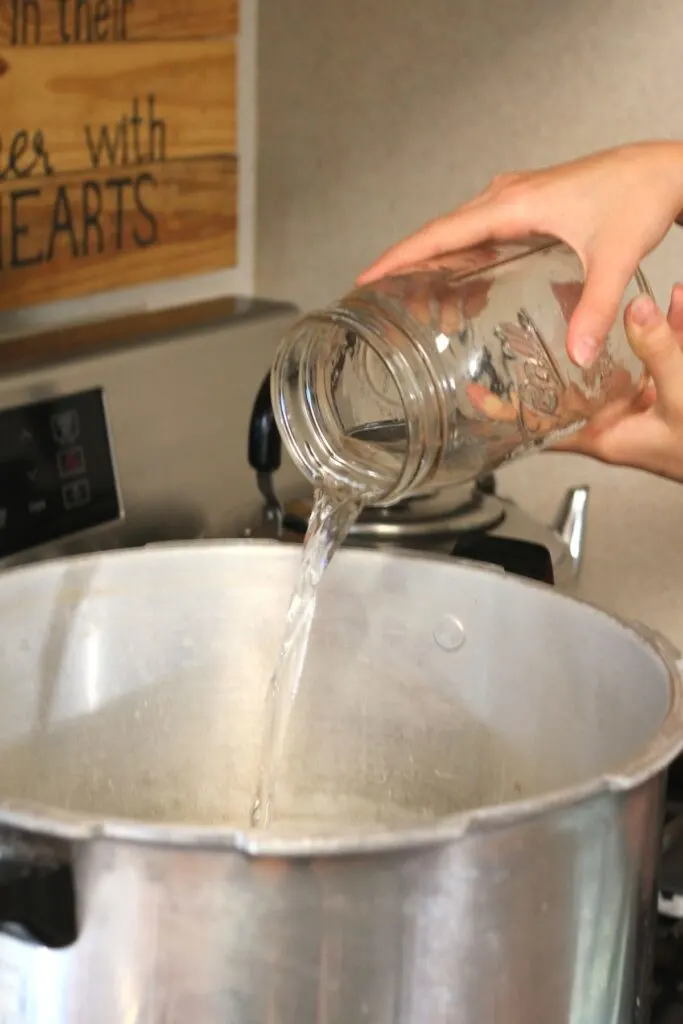
If you are raw-packing the jars, heat a stockpot of water to boiling. This will be the water you use for packing the carrots.


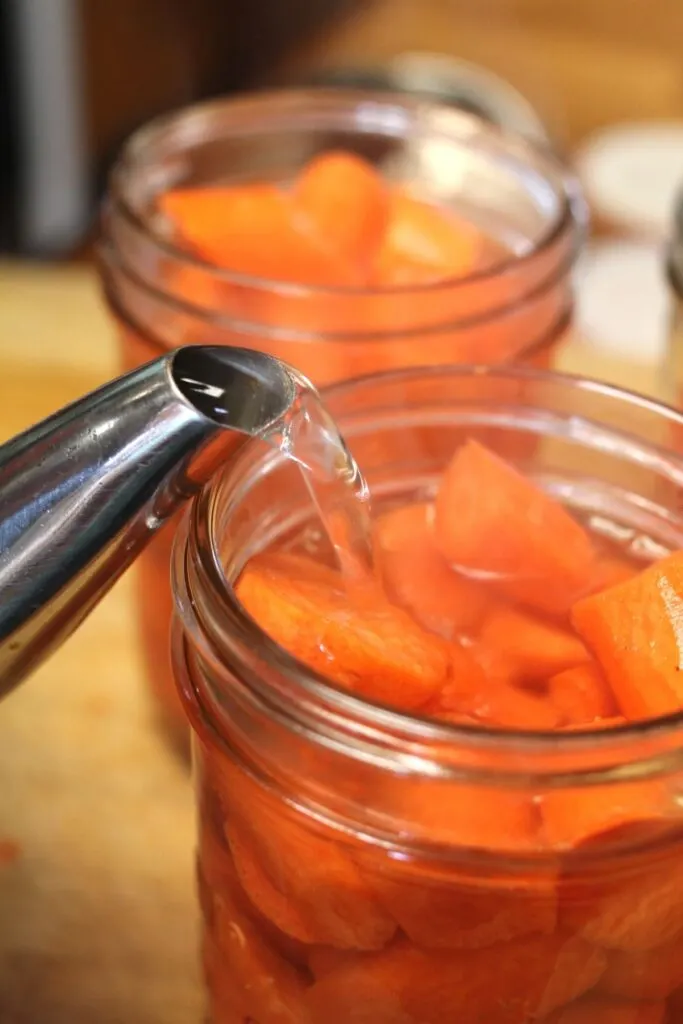
Step 4: Fill the Jars
Remove the jars from the canner (or wherever you had them to keep them hot) and put them on a towel on the counter.
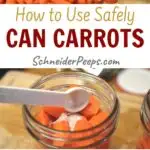
For hot-packing carrots use a slotted spoon to put the carrots into the jars. This will help ensure that all the jars have about the same amount of carrots. Then ladle the hot cooking water into the jars leaving a 1″ headspace.
For raw-packing carrots put the carrot pieces into the hot jars and ladle the hot water from the stockpot into each jar, leaving a 1″ headspace.
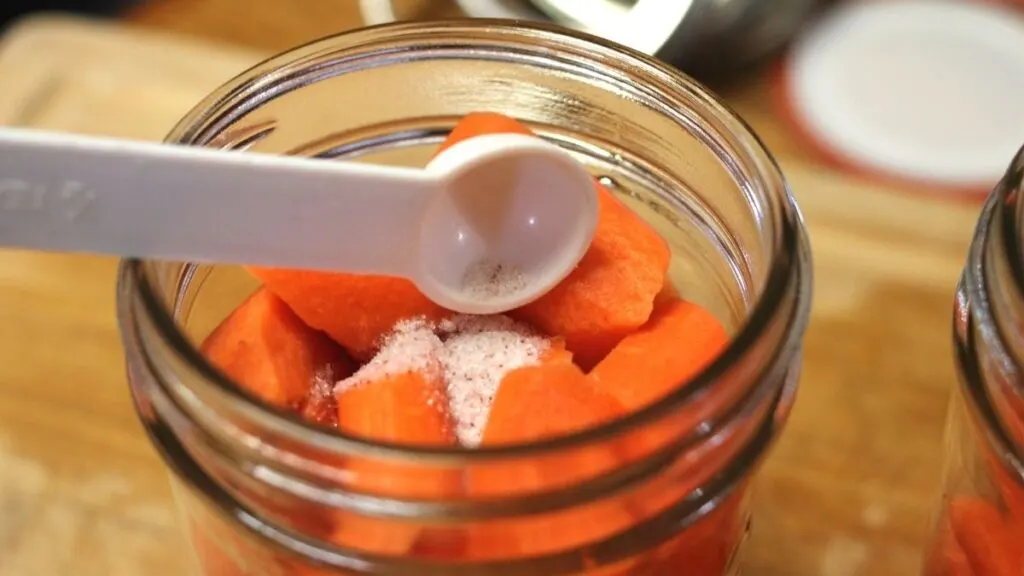
You can add 1/2 tsp salt to each quart size jar at this point, if you want to.
Using a bubble removal tool, remove the air bubbles from the jars. If you don’t have a bubble removal tool, you can use a silicone spatula or chopstick, but don’t use a butter knife or anything metal.
Recheck the headspace and add more water if needed to maintain 1″ headspace.
Wipe the rims of the jars with a clean, damp cloth.
Put the lids and bands on the jars and tighten to fingertip tight (about how you’d put a lid on a jar of mayonnaise).
Step 5: Process the Jars
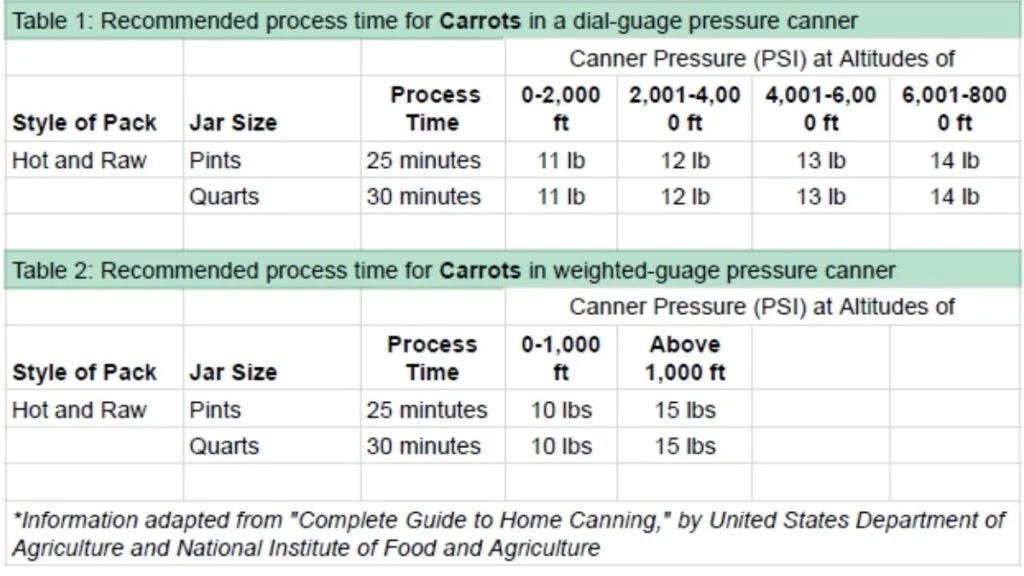
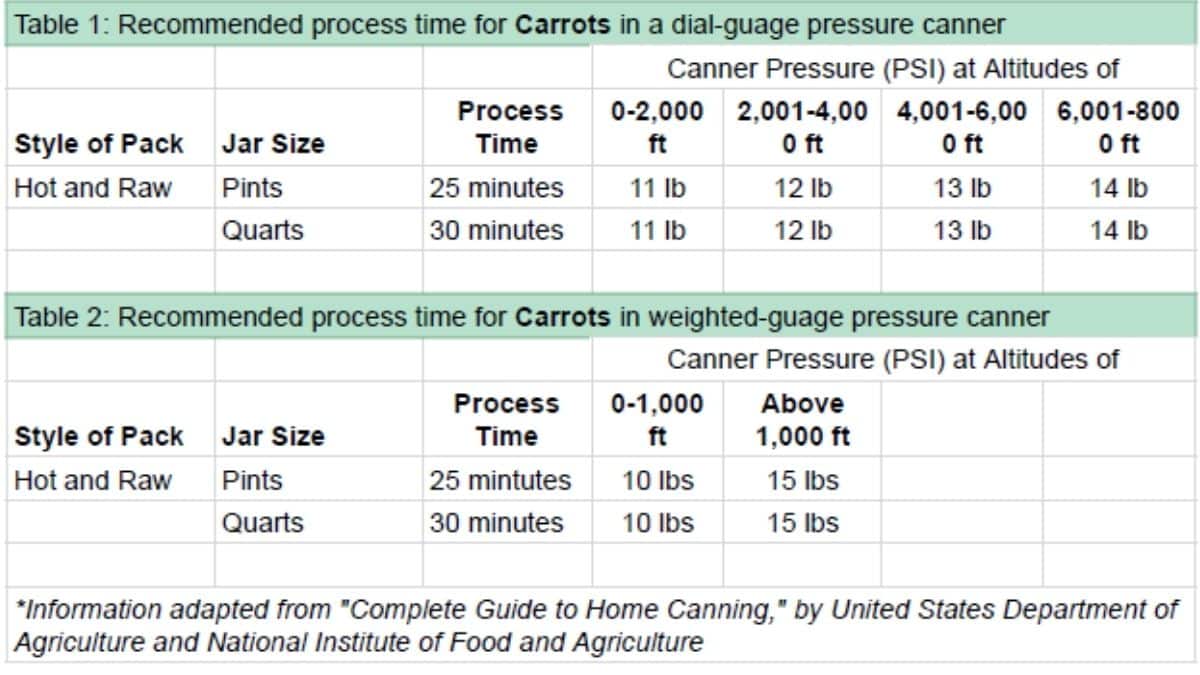
Put the filled jars into the canner and lock the lid onto the canner. Follow the directions that came with your canner for venting and bringing your canner up to pressure. Process the jars at 10psi for 25 minutes for pints and 30 minutes for quarts. Adjust for altitude, if needed. See chart below.


Step 6: Let the Jars Cool
When the processing time is complete, turn off the heat and let the pressure canner depressurize naturally. Refer the manufacturer’s instructions for opening the canner.
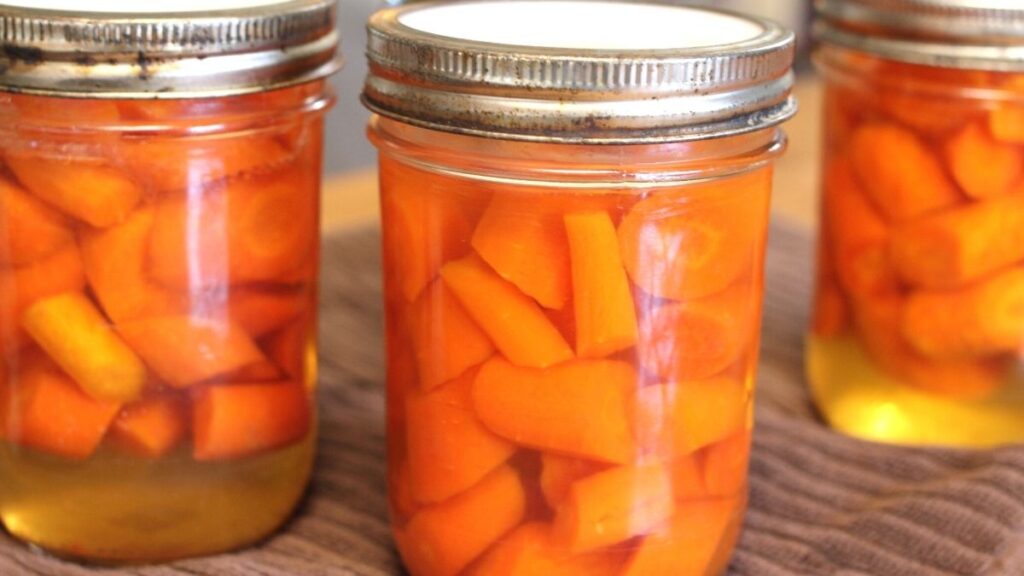
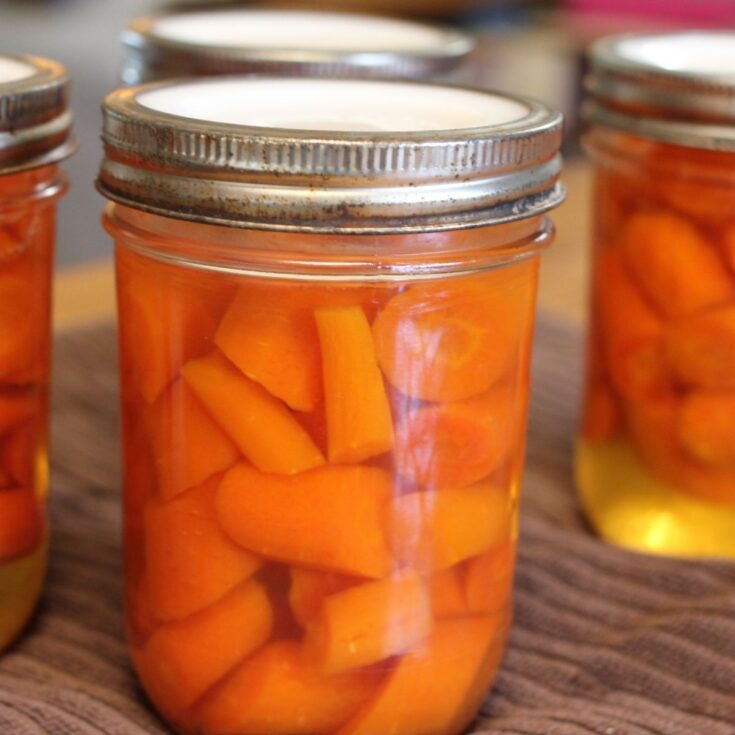
Once you open the canner, let the jars sit in the open canner for about 5 minutes before taking them out. Set them on a towel on the counter to cool for 12 hours….I usually just let them sit overnight.
Take the bands off the jars and make sure they all sealed before storing them in the pantry. If any didn’t seal, put them in the refrigerator to use first. Home canned carrots should be used within 12 months.
Using Canned Carrots
While canned plain carrots aren’t very exciting, they are super versatile. You can make a super quick vegetable soup by adding canned potatoes, green beans, and tomatoes to canned carrot. Just add some salt, pepper, garlic, and thyme to season it.
You can add canned carrots to other canned soups to give them some variety or to make them stretch further.
One thing to know about canned carrots is that they are already soft and cooked, so they don’t need much cooking other than heating up. They also tend to a little watery, so I usually drain the liquid and sauté canned carrots in a little butter to heat them up if I’m serving them as a side dish.
Here’s a great tutorial on cooking canned carrots several different ways.
Tried this recipe? Please leave a ⭐️⭐️⭐️⭐️⭐️ star rating in the recipe card below and/or a review in the comment section further down the page. We always appreciate your feedback. You can also save the recipe for later by pinning it or clicking on the heart in the lower right hand corner.
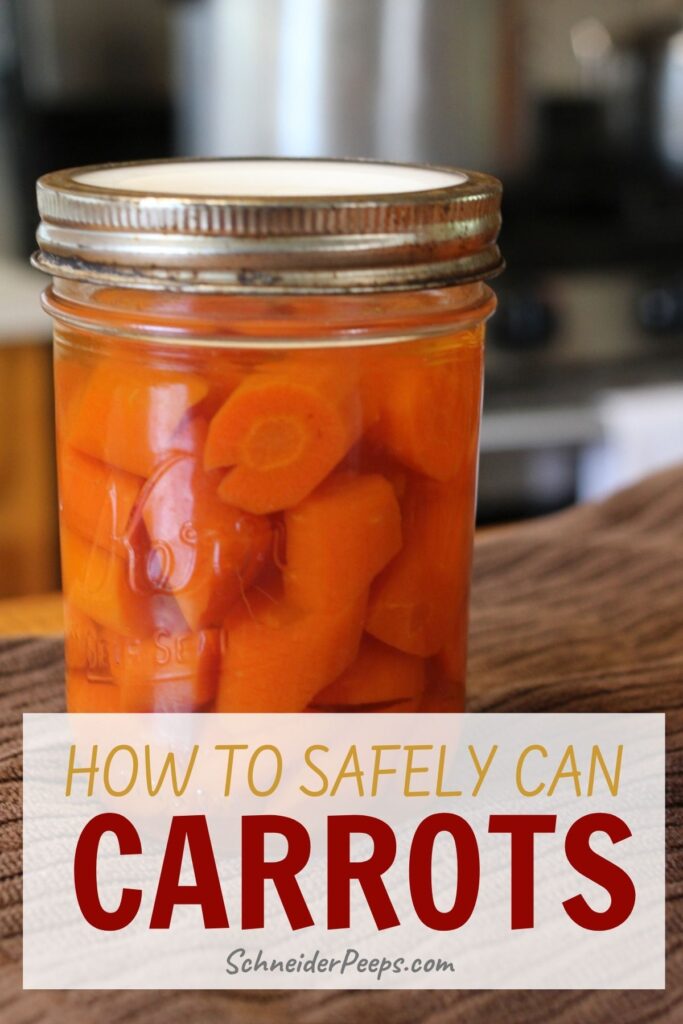

Canning Carrots (how to can carrots)
Pressure canning carrots is an easy way to preserve carrots for longer term storage. Canned carrots are very versatile and can be used to make a quick soup or side dish.
Ingredients
- 17 pounds carrots without greens
- Non-idolized salt (optional)
Instructions
Step 1: Prepare the Canner
Wash the pressure canner and the racks. Fill the pressure canner with about 3" of water (refer to the manufacturer's instructions for how much water to use in your canner.)
Put the rack in the bottom of the canner and put the canner on the stove. Heat the water until it's hot but not boiling - about 140F for raw-packed jars and 180F for hot-packed jars.
Step 2: Prepare the Jars and Lids
The jars and lids should be washed in hot, soapy water. While washing the jars, look for any nicks or cracks along the rim. Don't use any jars with nicks or cracks in them. The jars don't need to be sterilized but they need to stay hot, therefore, I put the jars in the pressure canner with the hot water while I prepare the carrots.
Ball/Kerr no longer recommend that their lids be hot before using, other manufacturers do recommend the lids be hot. I suggest reading the instructions on the box of lids because the recommendations can change.
Since carrots are something I can just for our family and not to give as gifts, I use reusable canning lids for canning carrots. I use both Harvest Guard lids and Tattler lids; they both work well, but you need to read the instructions because they work a little differently than metal lids.
Step 3: Prepare the Carrots
Wash, peel, and cut the carrots. You can cut them in sticks, chunks, or slices. If you're going to cut them in slices, they really need to be at least 1/4" thick. Carrots get soft when canned and really thin slices can fall apart when you're reheating them for serving.
If you are hot-packing the jars, put the carrot pieces in a stockpot of water and bring to a boil. Boil for 5 minutes.
If you are raw-packing the jars, heat a stockpot of water to boiling. This will be the water you use for packing the carrots.
Step 4: Fill the Jars
Remove the jars from the canner (or wherever you had them to keep them hot) and put them on a towel on the counter.
For hot-packing carrots use a slotted spoon to put the carrots into the jars. This will help ensure that all the jars have about the same amount of carrots. Then ladle the hot cooking water into the jars leaving a 1" headspace.
For raw-packing carrots put the carrot pieces into the hot jars and ladle the hot water from the stockpot into each jar, leaving a 1" headspace.
You can add 1/2 tsp salt to each quart size jar at this point, if you want to.
Using a bubble removal tool, remove the air bubbles from the jars. If you don't have a bubble removal tool, you can use a silicone spatula or chopstick, but don't use a butter knife or anything metal.
Recheck the headspace and add more water if needed to maintain 1" headspace.
Wipe the rims of the jars with a clean, damp cloth.
Put the lids and bands on the jars and tighten to fingertip tight (about how you'd put a lid on a jar of mayonnaise).
Step 5: Process the Jars
Put the filled jars into the canner and lock the lid onto the canner. Follow the directions that came with your canner for venting and bringing your canner up to pressure. Process the jars at 10psi for 25 minutes for pints and 30 minutes for quarts. Adjust for altitude, if needed. See chart below..

Step 6: Let the Jars Cool
When the processing time is complete, turn off the heat and let the pressure canner depressurize naturally. Refer the manufacturer's instructions for opening the canner.
Once you open the canner, let the jars sit in the open canner for about 5 minutes before taking them out. Set them on a towel on the counter to cool for 12 hours....I usually just let them sit overnight.
Take the bands off the jars and make sure they all sealed before storing them in the pantry. If any didn't seal, put them in the refrigerator to use first. Home canned carrots should be used within 12 months.
Notes
If you're canning in pints it will take about 11 pounds of carrots without the greens to fill 9 pint size jars.
Recommended Products
As an Amazon Associate and member of other affiliate programs, I earn from qualifying purchases.
![Skimmer Slotted Spoon, [Rustproof, Integral Forming, Durable] Newness 304 Stainless Steel Slotted Spoon with Vacuum Ergonomic Handle, Comfortable Grip Design Strainer Ladle for Kitchen, 14.96 Inches](https://m.media-amazon.com/images/I/31DZzn0-mTL._SL500_.jpg)

Shirley
Saturday 4th of March 2023
Thank you for the step by step pressure cooker canning tips. This will be my first time using a pressure cooker. I will read my pressure cooker instructions as well.
Angi Schneider
Thursday 9th of March 2023
You're so welcome! Feel free to reach out if you have any questions.
Sharon Co
Wednesday 16th of November 2022
After packing the jars as stated,can they be canned the old way in a boiling water kettle instead of a pressure cooker?! If so,for how long?!
Angi Schneider
Sunday 27th of November 2022
No, water bath canning low acids foods is not considered a safe canning practice and there are no current times or guidelines for water bath canning carrots. I know people do it but it's not been a recommended method for low acid foods for almost 100 years. You can get a small Presto pressure canner for under $100 that is safe and easy to use. Hope that helps.
Susie
Monday 1st of August 2022
Is there any problem if your jars arent hot when raw packing? They were cleaned with soap and water and I filled them with carrots and boiling water before (and salt) pressure canning. Everything sealed. Should I worry? Thank you
Angi Schneider
Thursday 4th of August 2022
No. The reason for the jars being hot is so that they don't crack from thermal shock when you put them in the hot canner.
Kathryn
Thursday 4th of November 2021
Peeling takes forever... pick em, cut off the greens, wash them, and then to peel them. What a pain and a waste! I wish there was a scientific way to by-pass this step :( :( :(
Bu Au
Sunday 29th of October 2023
@Angi Schneider, I’m trying to understand how all this works. If you peel carrots to reduce chance of introducing too much botulism into your canning from the skins of the carrot (since the peels are in dirt in the ground), why would it be okay to keep them and add to broth since botulism isn’t killed at boiling temps when making broth but will only be eliminated at 247 degrees F? What am I missing?
Angi Schneider
Friday 5th of November 2021
Lol...me too! I save the peels for broth making.