At the end of the summer when the garden is overflowing with basil, it’s the perfect time to start drying basil to stock your pantry. Fortunately, you don’t need any special equipment to dry basil. Let’s explore how to dry basil by hanging it, using an oven, and using a dehydrator.

Basil is an annual plant that loves the heat of the summer. It also likes dry conditions which makes it an easy to grow herb.
I like to grow basil plants along with our other summer vegetables such as tomatoes and squash. They make great companion plants. And help keep pests away.
All through the summer, I’ll harvest small amounts of basil to make pesto for our Friday night pizza, to cook with, or add to tomatoes while I’m canning them. The frequent harvesting helps the plants bush out and produce more leaves.
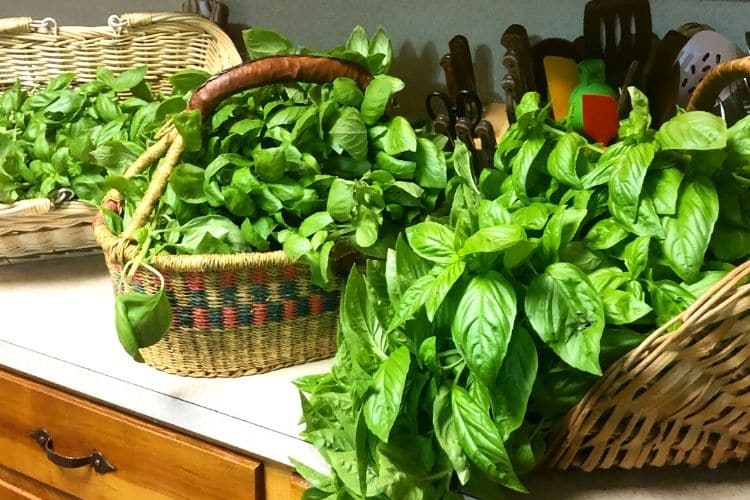
Towards the end of the summer, I’ll do a large harvest and cut the plants back by about two-thirds. I’ll use this harvest to make freezer pesto and stock the herb cabinet for winter.
Basil is best harvested before it starts to flower as it can get bitter. That being said, if the basil has started to flower, I’ll still harvest it and use it. I’ve never been able to tell a difference.
Use scissors or garden clippers when you harvest basil. The leaves bruise easily and can oxidize and turn black. They’ll also lose some of their flavor.


Harvesting and Preparing Fresh Basil
As I mentioned earlier, you really need to be gentle when harvesting basil so you don’t bruise it. Just use clippers and you’ll be fine.
I like to clip the stems off instead of just pinching off the leaves. I do this even when I’m only harvesting a little to just immediately. This will help the plant get bushy.
Once it’s harvested, basil need to be cleaned and preserved fairly quickly. Basil has a tendency to oxidize and turn black wherever there is a bruise, and sometimes where there isn’t a bruise. I like to get it all processed within an hour of harvesting.
If I harvested a lot of basil, I’ll fill a sink with cold water and put it all in the sink. Swish it around a bit and you’ll start to see dirt in the water. Occasionally there will be bugs that were hidden in the basil that need to be removed.
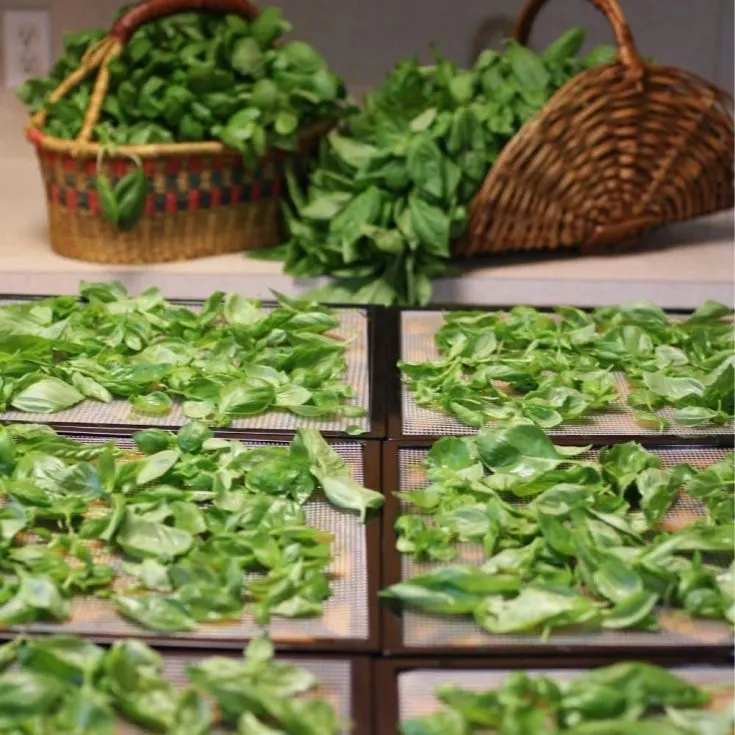
Next I pinch the leaves off the basil and put them in a salad spinner. Once it’s full, I spin the basil leaves to remove any excess water.
If you don’t have a salad spinner, or if you’re going to dry the basil in bunches, use several clean kitchen towels and pat the basil dry.
Now, the basil is ready for drying.


How to Dry Basil
I think most people will agree that while dried basil is good, it doesn’t have nearly the flavor that fresh basil does. Because of that, drying basil is not my favorite way to preserve basil.
However, I do like to keep dried basil on hand during the winter to quickly add to things I’m cooking or canning. So every summer I harvest and dry basil.
I’m often asked if it’s better to use an oven or dehydrator to dry basil. My answer is, “Use what you have.” The process will be a little different depending on if you use an oven or dehydrator (or air dry) to dry the basil. But the end result will be the same.
So, don’t get hung up on what’s “best.”


Air Drying Basil
Yes, you can air dry fresh basil. BUT you need to know a couple of things first.
Fresh basil has a high water content, so if you choose to dry basil by hanging and air drying it, be sure to bundle it in small bundles. Basil has a tendency to mold, and you don’t want that.
Using twine, tie 3-4 stems together. I like to tie the twine a second time, to act like a loop for hanging – kind of like you do with with Christmas ornaments.
Hang the stems in an area that is out of direct sunlight and that has good airflow. The sunlight can deteriorate the volatile oils that are in the basil – also known as the flavor.
If you hang them up against a wall, like I do, you’ll need to turn them over every day or so. This will allow the basil to dry evenly and reduce the risk of mold.
They should be fully dry in 4-5 days. You’ll know the basil is completely dry when the leaves break and don’t bend.
Once dried, you can leave them hanging or put them in a glass jar. If you’re going to leave them hanging long term, I suggest putting something over them to keep the light and dust off them. You can use a brown paper bag with slits in it or a coffee filter with a hole in the center for the string.


Using the Oven to Dry Basil
To dry basil in the oven, remove the basil leaves from the stems. I just pinch them off with my fingers. Just like when you harvest basil, you want to be careful not to bruise the leaves.
I like to line a baking sheet with parchment paper and use that to put the basil leaves on. The metal in the baking sheet can cause the basil to discolor, which is why I use parchment paper.
Lay the leaves on the lined baking sheet and put it in the oven. Turn the oven onto the lowest setting – mine is 175F.
You’ll want to keep an eye on them, so they don’t burn.
I turn the oven off after about 15 minutes at 175F and then check the basil a couple of hours later. If it’s not dry, I’ll heat the oven back to 175F and then turn it off. Once the oven has cooled a second time the basil is usually completely dry.
Once the basil is dry and cooled off, you can put the leaves in a jar and store it in the pantry (which we’re going to talk more about below.)


Drying Basil in a Dehydrator
Using a dehydrator is probably the easiest way to dry basil. But you’ll want to make sure your dehydrator has a temperature gauage.
I have three different dehydrators and I love them all for various reasons. One does not have a temperature gauge and I’ve learned that it gets too hot for drying herbs.
Basil, like other herbs, are sensitive to heat and light. The heat will cause the volatile oils to be released – your house will smell amazing, but the dried basil will be bland. So, if your dehydrator does not have a temperature gauge then use one of the other methods for drying basil.
To dry basil in the dehydrator, pinch the leaves off the stems and lay them out on the dehydrator trays. You can put them close together because they will shrink up quite a bit. Just don’t pile them high.
Put the filled trays in the dehydrator and turn it on to the herb setting which should be below 115F. It will take 4 to 6 hours for the basil to dry.
When the basil is completely dry and cooled, it can be put into a jar and stored in the pantry.
Storing Dried Basil
One of the things I’ve learned about storing dried basil is that the longer the leaves are kept whole, the more flavor it will have. Because of this, I prefer to store dried basil as whole leaves instead cut leaves.
If you’re going to keep the jars in a closed cabinet or pantry, a clear jar like a quart or half gallon mason jar is fine. However, if you keep your spices on open shelves, you should consider using colored jars to store them in.
Stored properly, dried basil should last a year or so.
It’s important to keep dried basil, and other herbs, in jars that have an airtight lid. And to not open them very often.
I like to keep a small jar in my pantry to use regularly, and then a larger jar to refill the small jar as needed. This keep the basil from being exposed to air over and over.
If you live in a humid area, you might want to use food grade silica desiccant packs. Or use a food saver and vacuum seal the jars that you’re using to refill the small jar.


Substituting Dried Basil for Fresh Basil
You can easily substitute dried basil for fresh basil and vice versa if you know the ratio to use.
If a recipe calls for fresh basil, you’ll use 1/3 that amount in dried basil. So, if you need 1 tablespoon fresh basil, you’ll use 1 teaspoon dried basil.
If a recipe calls dried basil, you’ll use 3X that amount of fresh basil. So, if it calls for 1/2 teaspoon dried basil, you’ll use 1 1/2 teaspoons fresh basil.
How to Use Dried Basil
You probably don’t need much direction here but I thought I’d mention a few ways to incorporate dried basil into your meals.
Dried basil is a great addition to soups and sauces, of course. But it’s also great added to butter and garlic and spread on bread for a tasty garlic bread.
If you have a little more time, you can make fresh zucchini calzones and add dried basil.
The thing I mainly use dried basil for is in canning recipes. In case you didn’t know, you can add dried herbs to any canned recipe and not mess up the safety of the recipe. And y’all, that’s a game changer.


Drying Basil (in the oven or dehydrator)

Drying basil is a great way to preserve fresh basil. It can dried in the oven, dehydrator, or even hung to air dry.
Ingredients
- Fresh Basil Leaves
Instructions
- Harvest basil using scissors or garden shears.
- Wash basil in cold water.
- Pinch the basil leaves off the stems.
- Remove the excess moisture by putting the leaves in a salad spinner or by gently patting them dry with a clean kitchen towel.
- Lay the leaves out in a single layer on a dehydrator tray or on a baking sheet lined with parchment paper.
- If you're using an oven, turn the oven on to the lowest setting (usually 175-200F) and put the filled baking sheet in the oven.
- Turn the oven off after about 20 minutes and let the basil remain in the oven as it cools off. If they are not completely dry in a couple of hours, turn the oven back on and once it reaches 175F turn it off. Let it cool with the basil in the oven.
- If you're using a dehydrator, set the temperature to no higher than 115F and put the filled trays in (or on) the dehydrator. It should take about 4-6 hours for the basil to dry. But it could take longer.
- The basil is completely dry when it crumbles easily and there's no obvious sign of moisture. It's shouldn't bend, it should break.
- Store in an air tight jar out of direct sunlight. Try to keep the leaves whole as long as possible.
- To use, crush the dried basil leaves with your fingers, a mortar and pestle, or food processor.
Recommended Products
As an Amazon Associate and member of other affiliate programs, I earn from qualifying purchases.


Jerome Rodil
Sunday 7th of February 2021
Thank you for sharing this information. I really learned from it. I grow basil indoors in Auckland, so I doubly appreciate the tips against humidity.
Angi Schneider
Tuesday 9th of February 2021
You're welcome!