
I know, who can think of soups, especially heavy soups like chili in this heat? I do. In fact, every summer I spend a couple of days canning chili con carne and beef (or venison) stew for the winter.
Why?
Because it helps me feed the family home cooked meals even during the busy school year. During the school year at least one of us has something outside the home almost every evening. We try super hard to eat dinner as a family each evening. Sometimes we eat at 6pm and sometimes we eat at 8pm. It just depends on when everyone is going to be home.
I know that having ready-to-eat canned meals will help us make eating together each evening a priority during crazy busy times. Of course, we could just pick up take out on the way home and then eat together as a family but that doesn’t fit into our budget.
So last week, even though it was hot, I made some chili con carne and canned it. My family was so happy….until I told them they couldn’t have any unless a seal failed. Then they were praying for the seals to fail. Fortunately for them, two seals failed.
We ate one jar for lunch and one of my older boys took the other to work for lunches for a couple of days. I know this sounds mean, but I have to say no if I’m going to have ready to eat meals available when I need them. Not just when we feel like eating them. So for now they’re of limits.
Chili con carne goes well with cornbread, rice or tortilla chips or even sourdough bread which I usually have on hand.. The deciding factor for me is how much time do I have to prepare a side? I need a hour for cornbread, 20 minutes for rice and 2 minutes to pour tortilla chips into bowl. I’ll also serve fruit or salad to help round out the meal.
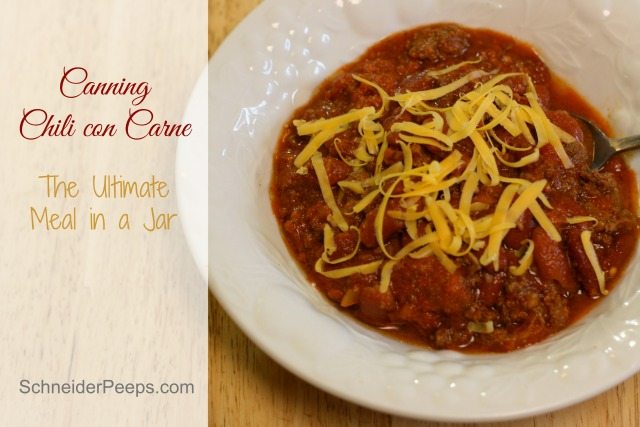
When you open the jar, the chili con carne will be pretty thick. You can add water to thin it out if you prefer it thinner. I usually thin it with the tomato broth we make each summer.
I like to can chili con carne in wide mouth jars because it’s think. A wide mouth pint size jars is perfect for my guys to take for lunches when we don’t have left overs from the night before. Also, I use a really big pot to cook this in, it’s about 32 pints.
Lastly, please be sure to double check the processing times in the book that came with your canner or the Ball Blue Book, especially if you are new to canning or live at a high altitude.
I have some preservation worksheets to help you keep track of the foods you preserve for you family. Just fill out the form below and they’ll be emailed to you.
Canning Chili con Carne


Ingredients
- 6 lbs hamburger meat
- 2 lbs dried beans
- 3 onions
- 1 head garlic
- 5 quarts canned tomatoes (or 10 lbs chopped fresh tomatoes)
- 6 tbsp chili powder
- 4 tbsp cumin
- 2 tsp pepper
- 3 tsp salt
Instructions
- Soak the beans overnight.
- In the morning, drain off the old water, rinse the beans and put them in a pot with fresh water and cook for about 30 minutes - you don't want them all the way cooked.
- While the beans are cooking, prepare the canning jars and lids.
- Make sure they are clean by either hand washing or running through a dishwasher. Since you'll be using a pressure canner, the jars don't need to be sterile.
- Keep the jars hot while preparing the chili con carne. You can leave them in the dishwasher, put them in an ice chest with hot some hot water, or put them in a pot with hot water.
- In a large pot, brown the meat.
- While the meat is cooking add the onions and garlic.
- After the meat is cooked, add the spices, the tomatoes and the beans. Mix well.
- Ladle in to the clean jars leaving a 1-inch headspace.
- Wipe the rims of the jars, put the lids and bands on.
- Process pints for 75 minutes at 10psi, adjusting for altitude if necessary.
What are your favorite ready-to-eat meals to can? Feel free to leave links or recipes in the comments so we can all see them.
Glenna
Friday 6th of January 2023
What kind of beans do you use?
Angi Schneider
Sunday 8th of January 2023
I usually use kidney (red) beans but you can use whatever dried beans your family likes.
Joan
Monday 2nd of January 2023
Question, I sent an email to MSU Food program regarding some chilli I canned via the pressure cooker (which I am still not sure I like) but there seems to be a layer of fat in the canned jars on the top is this spoiled? I am not opposed to tossing it I just don't want to toss something that is just fine. Thank you much.
Angi Schneider
Wednesday 4th of January 2023
The layer of fat is from the meat. As long as you followed a tested recipe and procedure the fat on top of the jar does not spoil the contents. Whenever you can meat, there will be a layer of fat in the jar.
Shirl Papaian
Monday 31st of October 2022
Do I drain the meat after cooking? How full do I fill the jars, how much headspace do I leave?
Angi Schneider
Sunday 6th of November 2022
I don't drain the meat, but I use lean meat. You can if you want. Leave a 1-inch headspace.
Menolly
Thursday 31st of March 2022
Hi! I just ordered a 15.5 qt All American canner, but it's only taking 8 pints at a time. Can I halve the recipe, and is it safe for the chili to wait in the pot until I'm ready to can the second batch?
Thank you!
Angi Schneider
Tuesday 5th of April 2022
Yes, you can halve the recipe. It can also stay in the pot, just bring it back to a boil before filling the second round of jars.
Rudy
Saturday 23rd of October 2021
Sauté the onions first for better flavor then add the beef & cook.